
How to Explore the Blockscout Pro API with Postman
The Blockscout Pro API Postman collection is live. Import it, add your API key, and start querying 100+ EVM chains in under 5 minutes.
The Blockscout Pro API Postman collection is live and includes every endpoint, organized, ready to run. Import it once, set your API key, and you can query address balances, transactions, token transfers, and contract data across dozens of EVM chains without writing a line of code.
This guide walks you through setup to your first successful API call in about five minutes.
The Postman Collection
The Blockscout Pro API Postman collection is a pre-built set of HTTP requests covering every endpoint in the Pro API. Explore addresses, transactions, token transfers, smart contracts, blocks, search, internal transactions, and chain-specific endpoints. By the end of this guide you'll have a working Postman environment connected to the Pro API, and you'll have run your first real queries against a live EVM chain.
- Import the Blockscout Pro API collection into Postman
- Configure environment variables for your API key and chain
- Run address, transaction, and token transfer queries
- Read paginated responses using
next_page_params
Getting Started
- A free Blockscout Pro API key. Get one at dev.blockscout.com
- The Postman desktop app or Postman Web
Step 1: Get your free Pro API key
The Blockscout Pro API uses a credit-based system where each API call consumes a set number of credits depending on the endpoint's resource cost. The free plan gives you 100K API credits per day with a 5 RPS rate limit with no credit card required and no expiry. Most standard endpoints cost 20 credits per call, while heavier endpoints like /transactions/:hash/summary or /transactions/:hash/raw-trace cost 50 credits. At 20 credits per call, 100K daily credits translates to roughly 5,000 standard requests per day before the counter resets at midnight UTC.
To get your key, go to dev.blockscout.com and sign in with your email or a wallet. Open the Keys section and click Create API key. The dashboard also shows real-time credit usage, your current rate-limit headroom, and your top endpoints by consumption. This is useful for understanding where credits are going as you build. When you need more capacity, paid plans start at $49/month (100M credits, 15 RPS) up to $999/month for 3B credits and 50 RPS.
Your key will look like proapi_xxxxxxxxxxxxxxxx. Copy it somewhere handy, you'll paste it into a Postman environment variable in Step 3.
Step 2: Import the Postman collection
Open the Postman app and click Import in the top-left corner. Select the Link tab and paste this URL:
https://www.postman.com/crimson-sunset-782323/blockscout-apis/collection/f757905/blockscout-pro-apiAlternatively, search for Blockscout APIs in the Postman API Network. Confirm the import and the collection appears in your sidebar, with every Pro API endpoint organized into folders by category. The collection covers the full Pro API surface: addresses (balances, coin history, tokens held, logs), transactions (history, internal txns, decoded logs, state changes, raw trace), tokens (metadata, holder lists, transfers), blocks, smart_contracts (source code, ABI, read/write), token_transfers, search, internal_transactions, and chain-specific folders for Optimism, Scroll, and Zilliqa. Chain-specific endpoints for account abstraction (ERC-4337 bundles and user operations) are also included. Every request in the collection is pre-wired to use the {{apiKey}} and {{chainId}} environment variables you'll configure in the next step, no manual URL editing required.
Step 3: Configure your environment
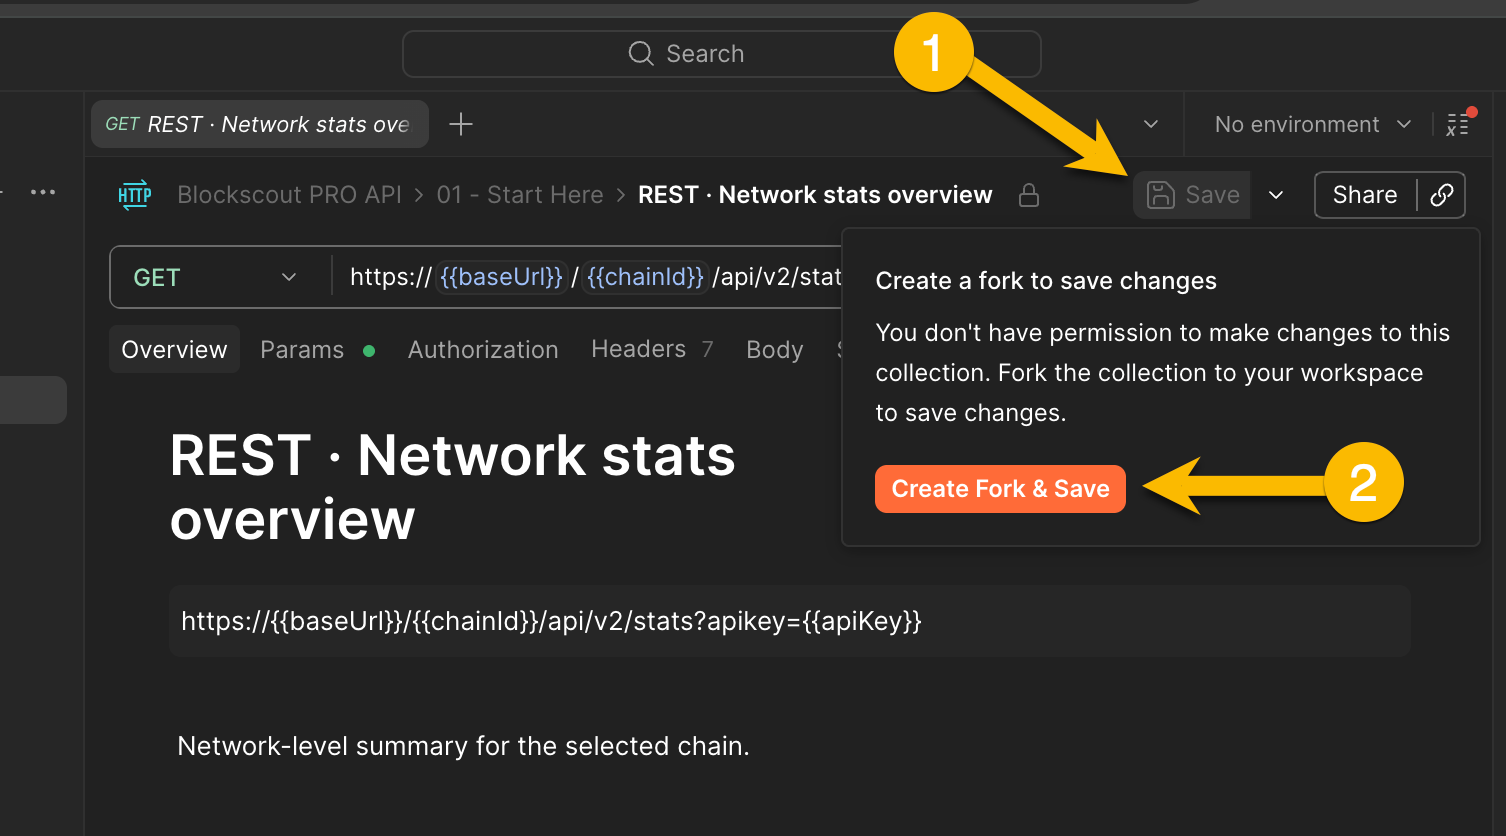
The collection uses two environment variables so you can switch chains and keys without editing individual requests. In Postman, you can add these during individual requests, or fork the collection to update add an Environment.
Fork the collection

Add an Environment
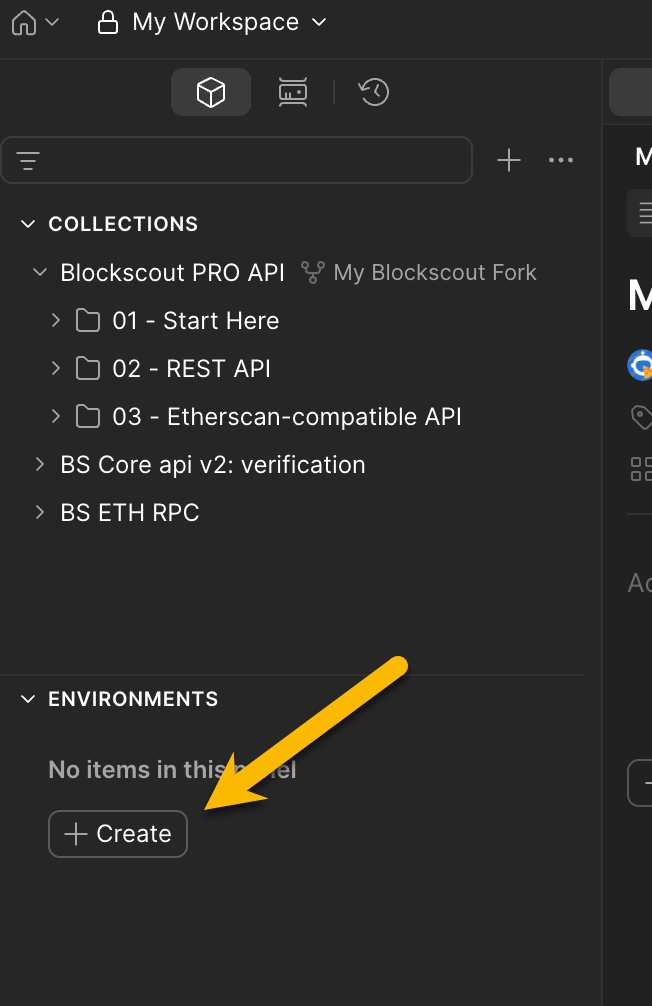
Go to Environments → Create and create a new environment called "Blockscout Pro".
Add the apiKey and chainId variables. In this example we use 1 for the Ethereum mainnet chain. Use the variable for the chain you want to explore.
| Variable | Example |
|---|---|
apiKey |
proapi_... |
chainId |
|
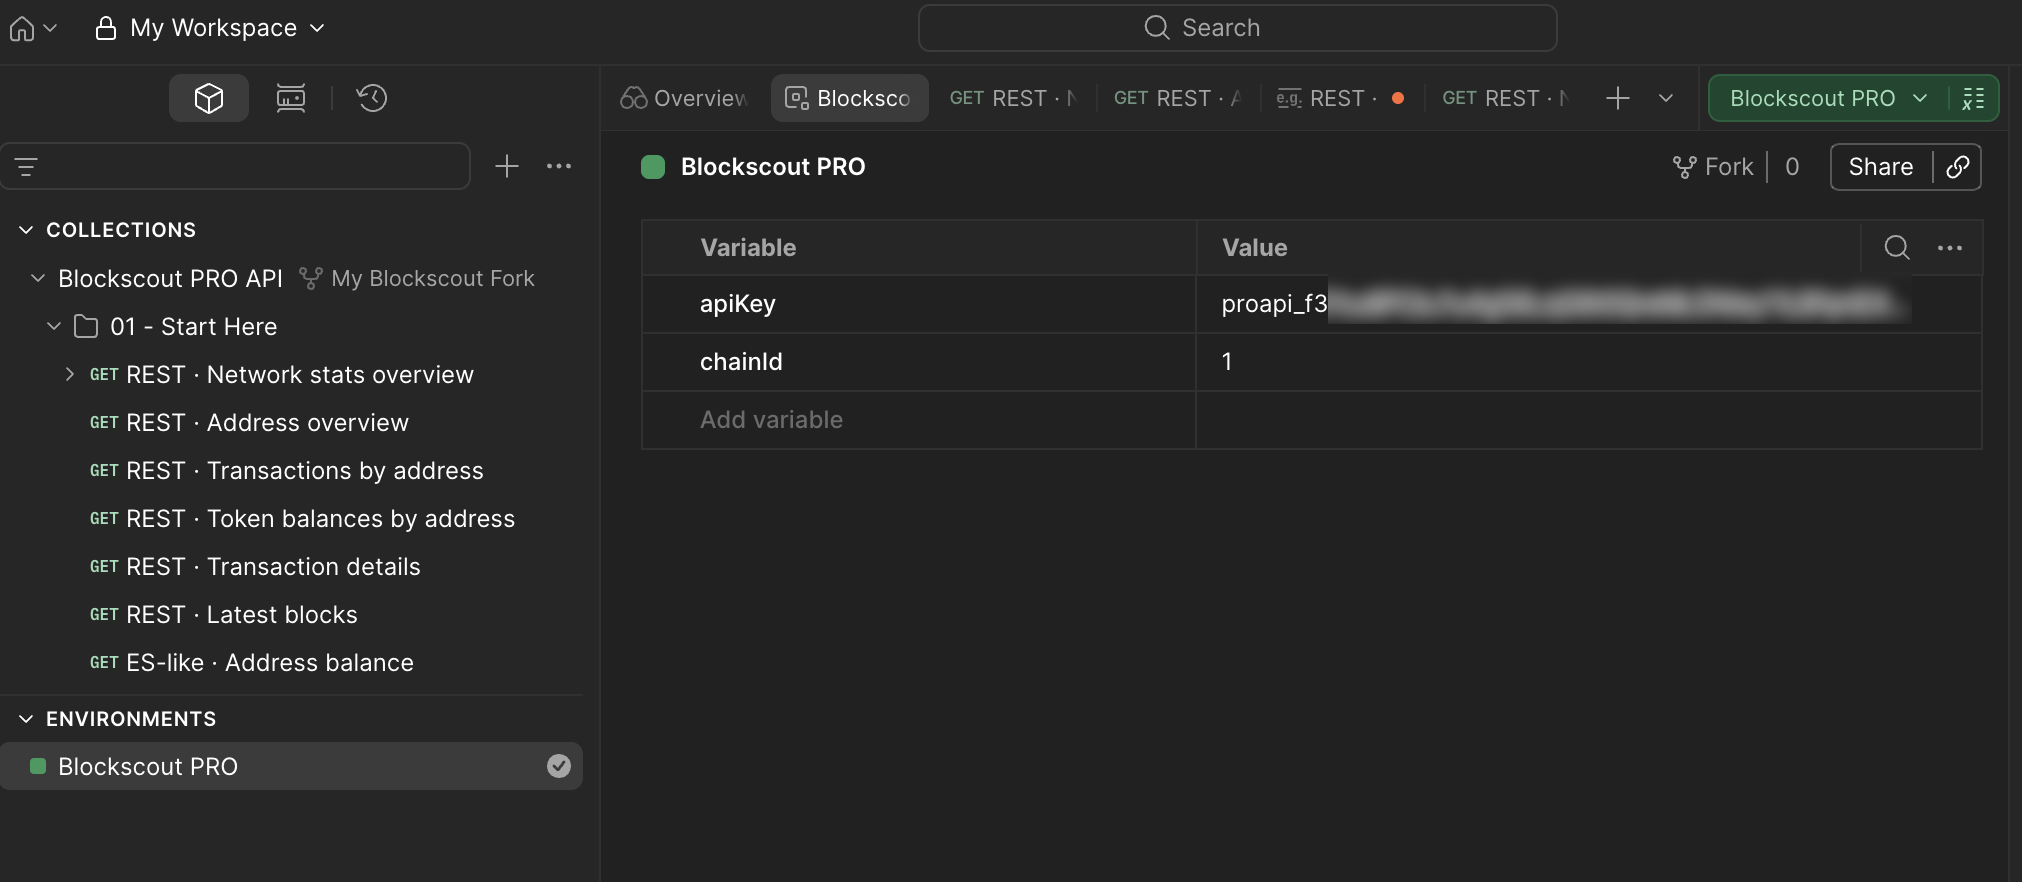
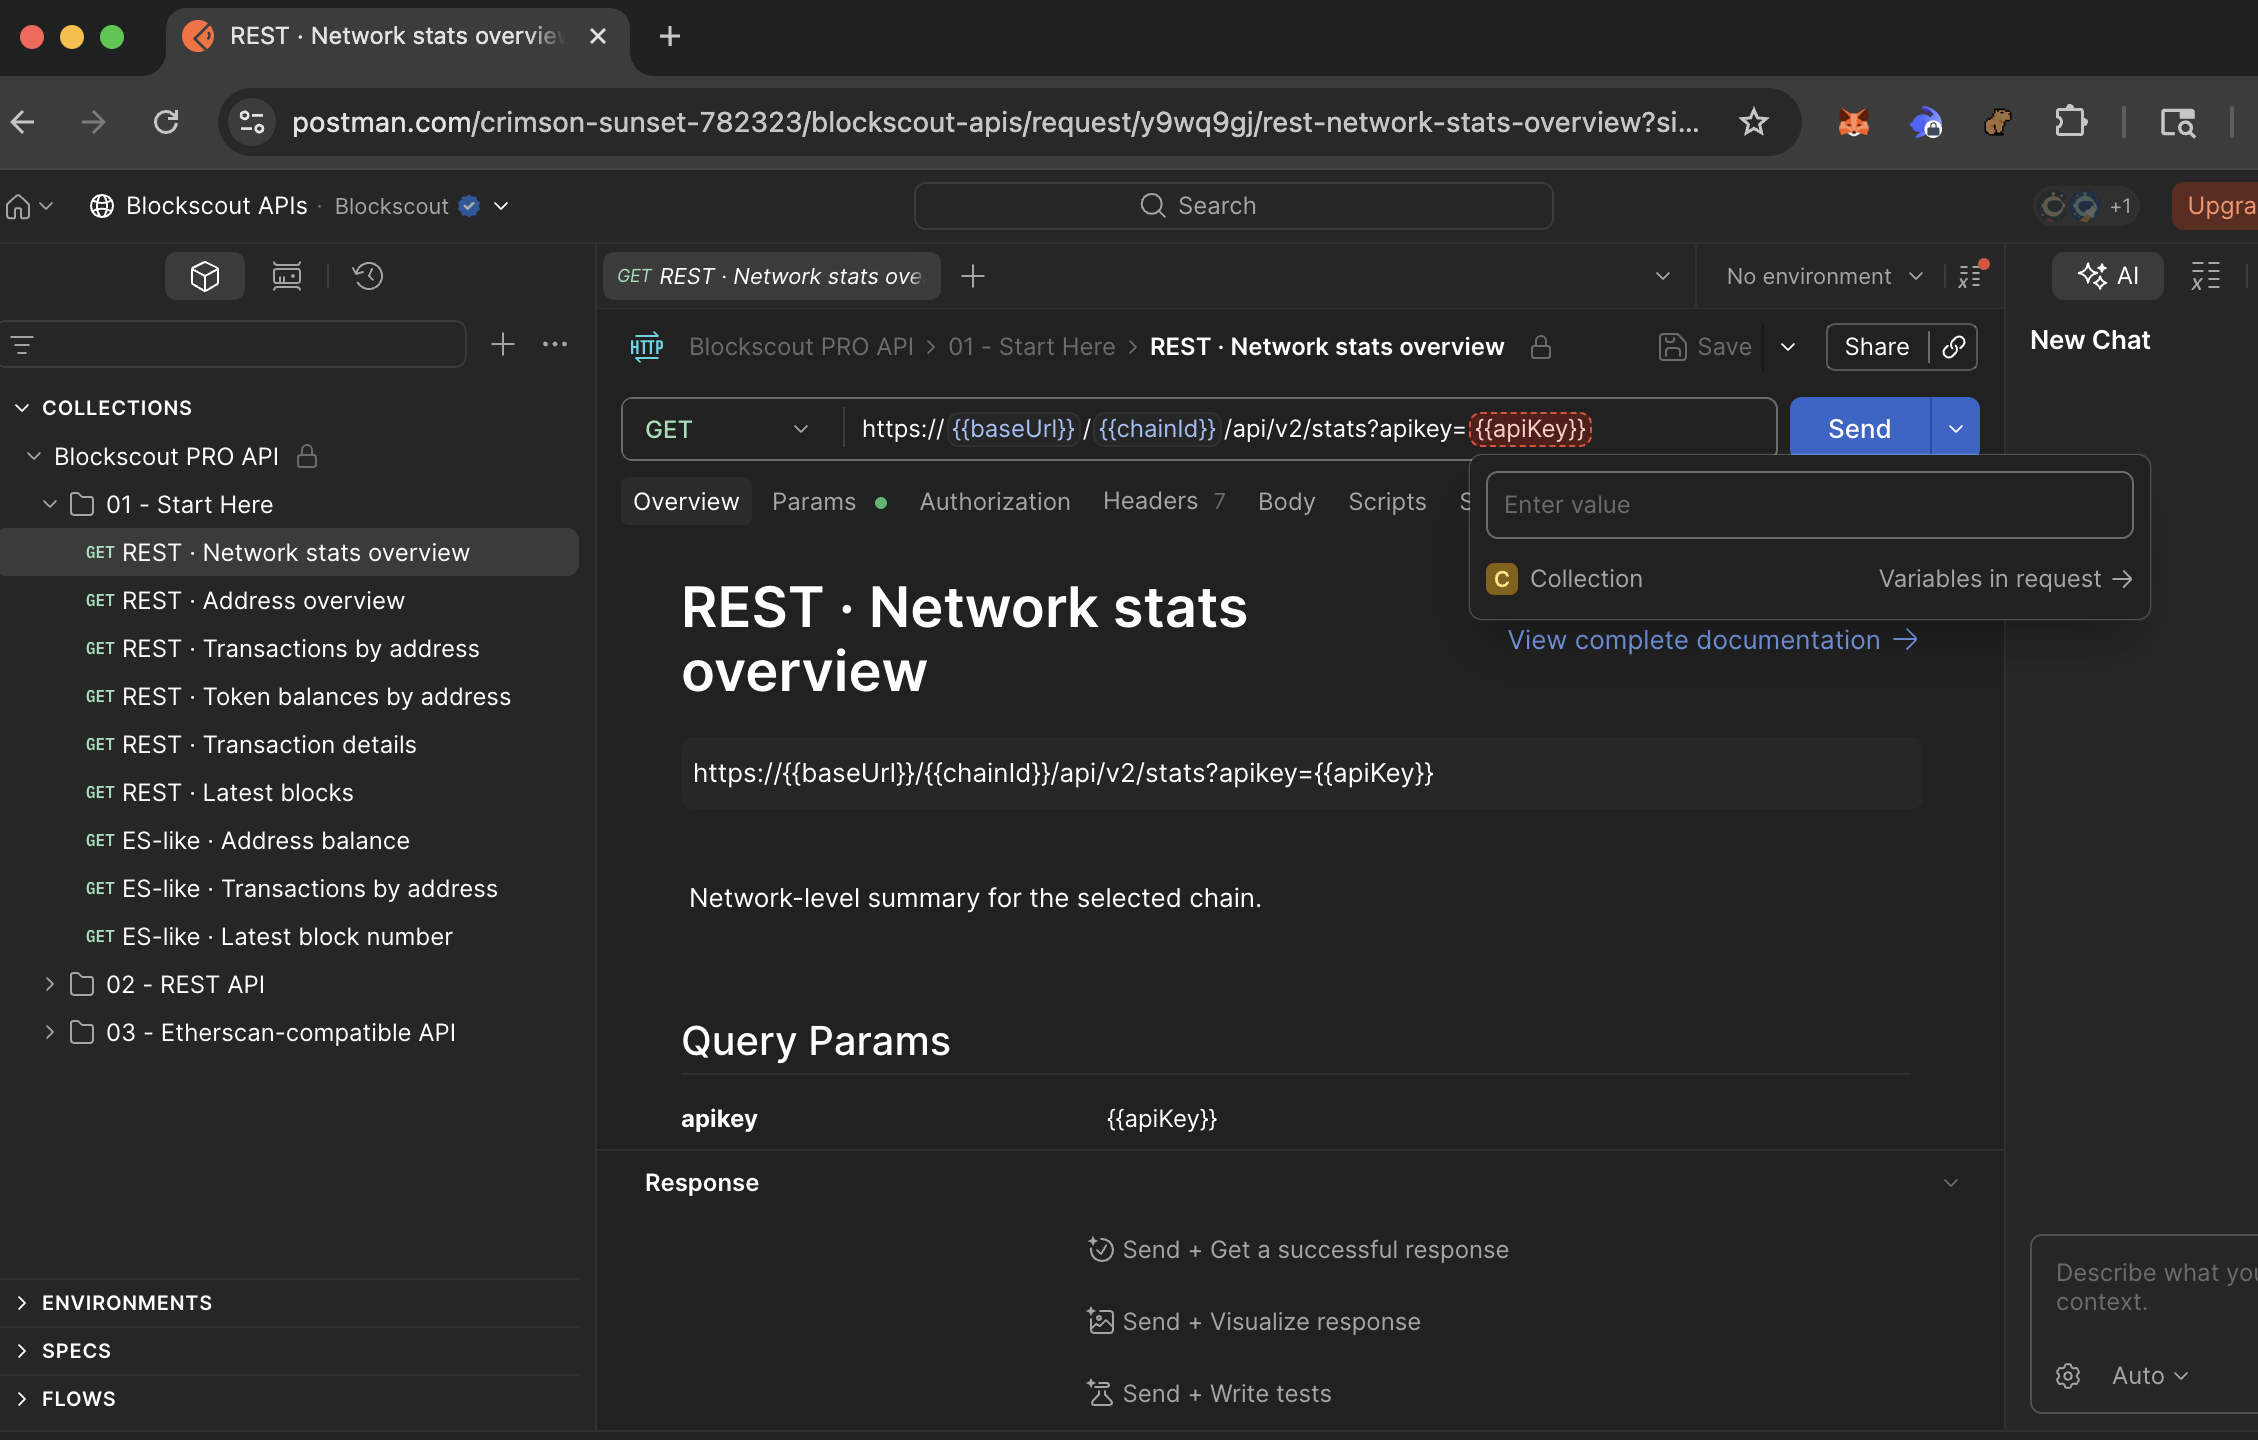
Save the environment and select it as active from the dropdown in the top-right corner of Postman. Every request in the collection already references {{apiKey}} and {{chainId}} , switching chains is a single variable change.
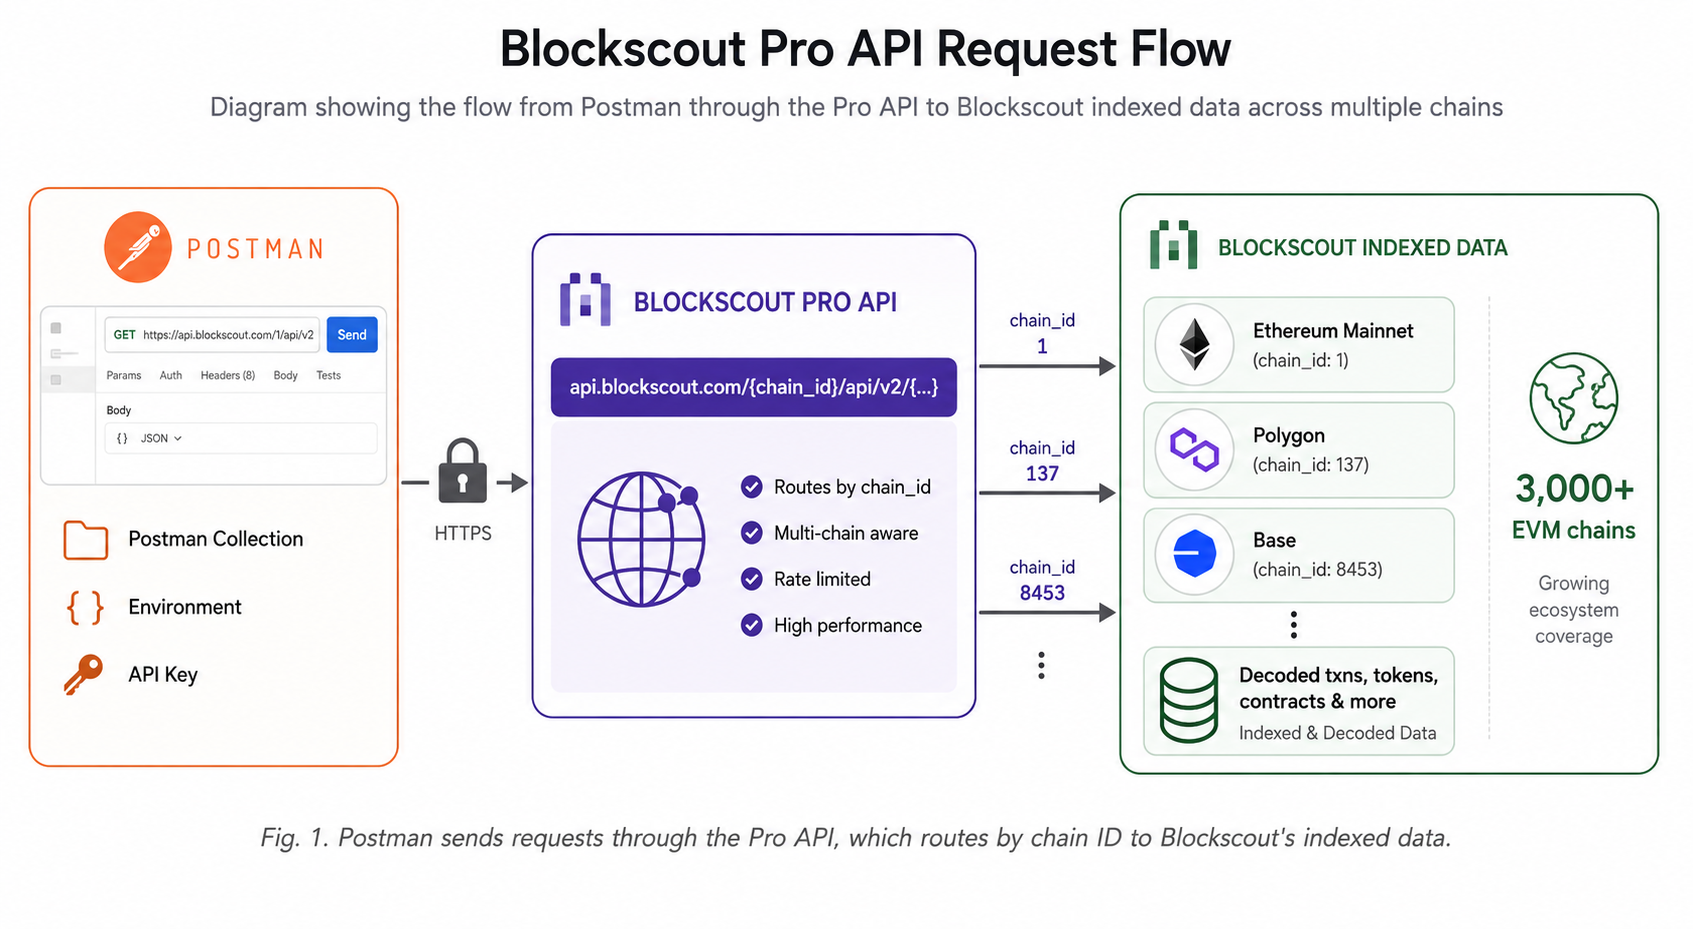
To query Ethereum mainnet, set chainId to 1. To query Base, set it to 8453. To query OP Mainnet, set it to 10. All Blockscout-indexed chains use the same base URL format ( https://api.blockscout.com/{chainId}/api/v2/ ) with the chain ID as the only differentiator. You never need a separate API key or a separate collection for a different network.
Supported chains Full list of chains and their IDs: chains.blockscout.com. Popular chain IDs: Ethereum (1), OP Mainnet (10), Base (8453), Arbitrum One (42161), Gnosis (100), Celo (42220), Scroll (534352).
Step 4: Make your first calls
With the environment active, open any folder in the collection and hit Send. Here are three endpoints worth running first.
Get address info
Open the addresses folder and select Get address. Set the address_hash path variable to any wallet or contract address and send:
GET https://api.blockscout.com/{{chainId}}/api/v2/addresses/{{address_hash}}?apikey={{apiKey}}The response includes the ETH balance (in wei as a string), total transaction count, number of distinct tokens held, a boolean indicating contract vs. EOA, any associated ENS domain name, and the address's creation transaction hash if it's a contract.
This single endpoint replaces what would otherwise require 3–4 separate RPC calls: eth_getBalance, eth_getTransactionCount, a token balance scan, and an ENS reverse lookup. Example response (simplified):
{
  "hash": "0xd8dA6BF26964aF9D7eEd9e03E53415D37aA96045",
  "is_contract": false,
  "coin_balance": "929143427830428600000",
  "transaction_count": 1082,
  "has_tokens": true,
  "ens_domain_name": "vitalik.eth"
}
Get transactions for an address
Under transactions, select Get transactions for address. Unlike a raw RPC call, which gives you an array of transaction hashes you'd then need to decode individually, this endpoint returns fully decoded transaction history in a single response. Each item in the items array includes the transaction hash, block number, timestamp, from and to addresses, ETH value transferred, decoded method name (e.g. transfer, swap, deposit), gas used, gas price, transaction fee in ETH, and a result field showing success or revert reason. This is the same data Blockscout's explorer renders on the transactions tab for any address and structured for programmatic use:
GET https://api.blockscout.com/{{chainId}}/api/v2/addresses/{{address_hash}}/transactions?apikey={{apiKey}}Get token transfers by address
The /token-transfers endpoint returns ERC-20, ERC-721, and ERC-1155 transfers for an address in a single, unified call with no separate requests per token standard required. Each transfer item in the response includes the token contract address, token name, symbol, and decimals; the transfer amount (for ERC-20) or token ID (for ERC-721/1155); the from and to wallet addresses; the transaction hash that triggered the transfer; and the block number and timestamp. Token metadata is decoded and included inline, so you don't need a separate lookup to get the symbol or decimals. This makes the endpoint practical for building portfolio views, activity feeds, and tax reporting tools without additional enrichment steps:
GET https://api.blockscout.com/{{chainId}}/api/v2/addresses/{{address_hash}}/token-transfers?apikey={{apiKey}}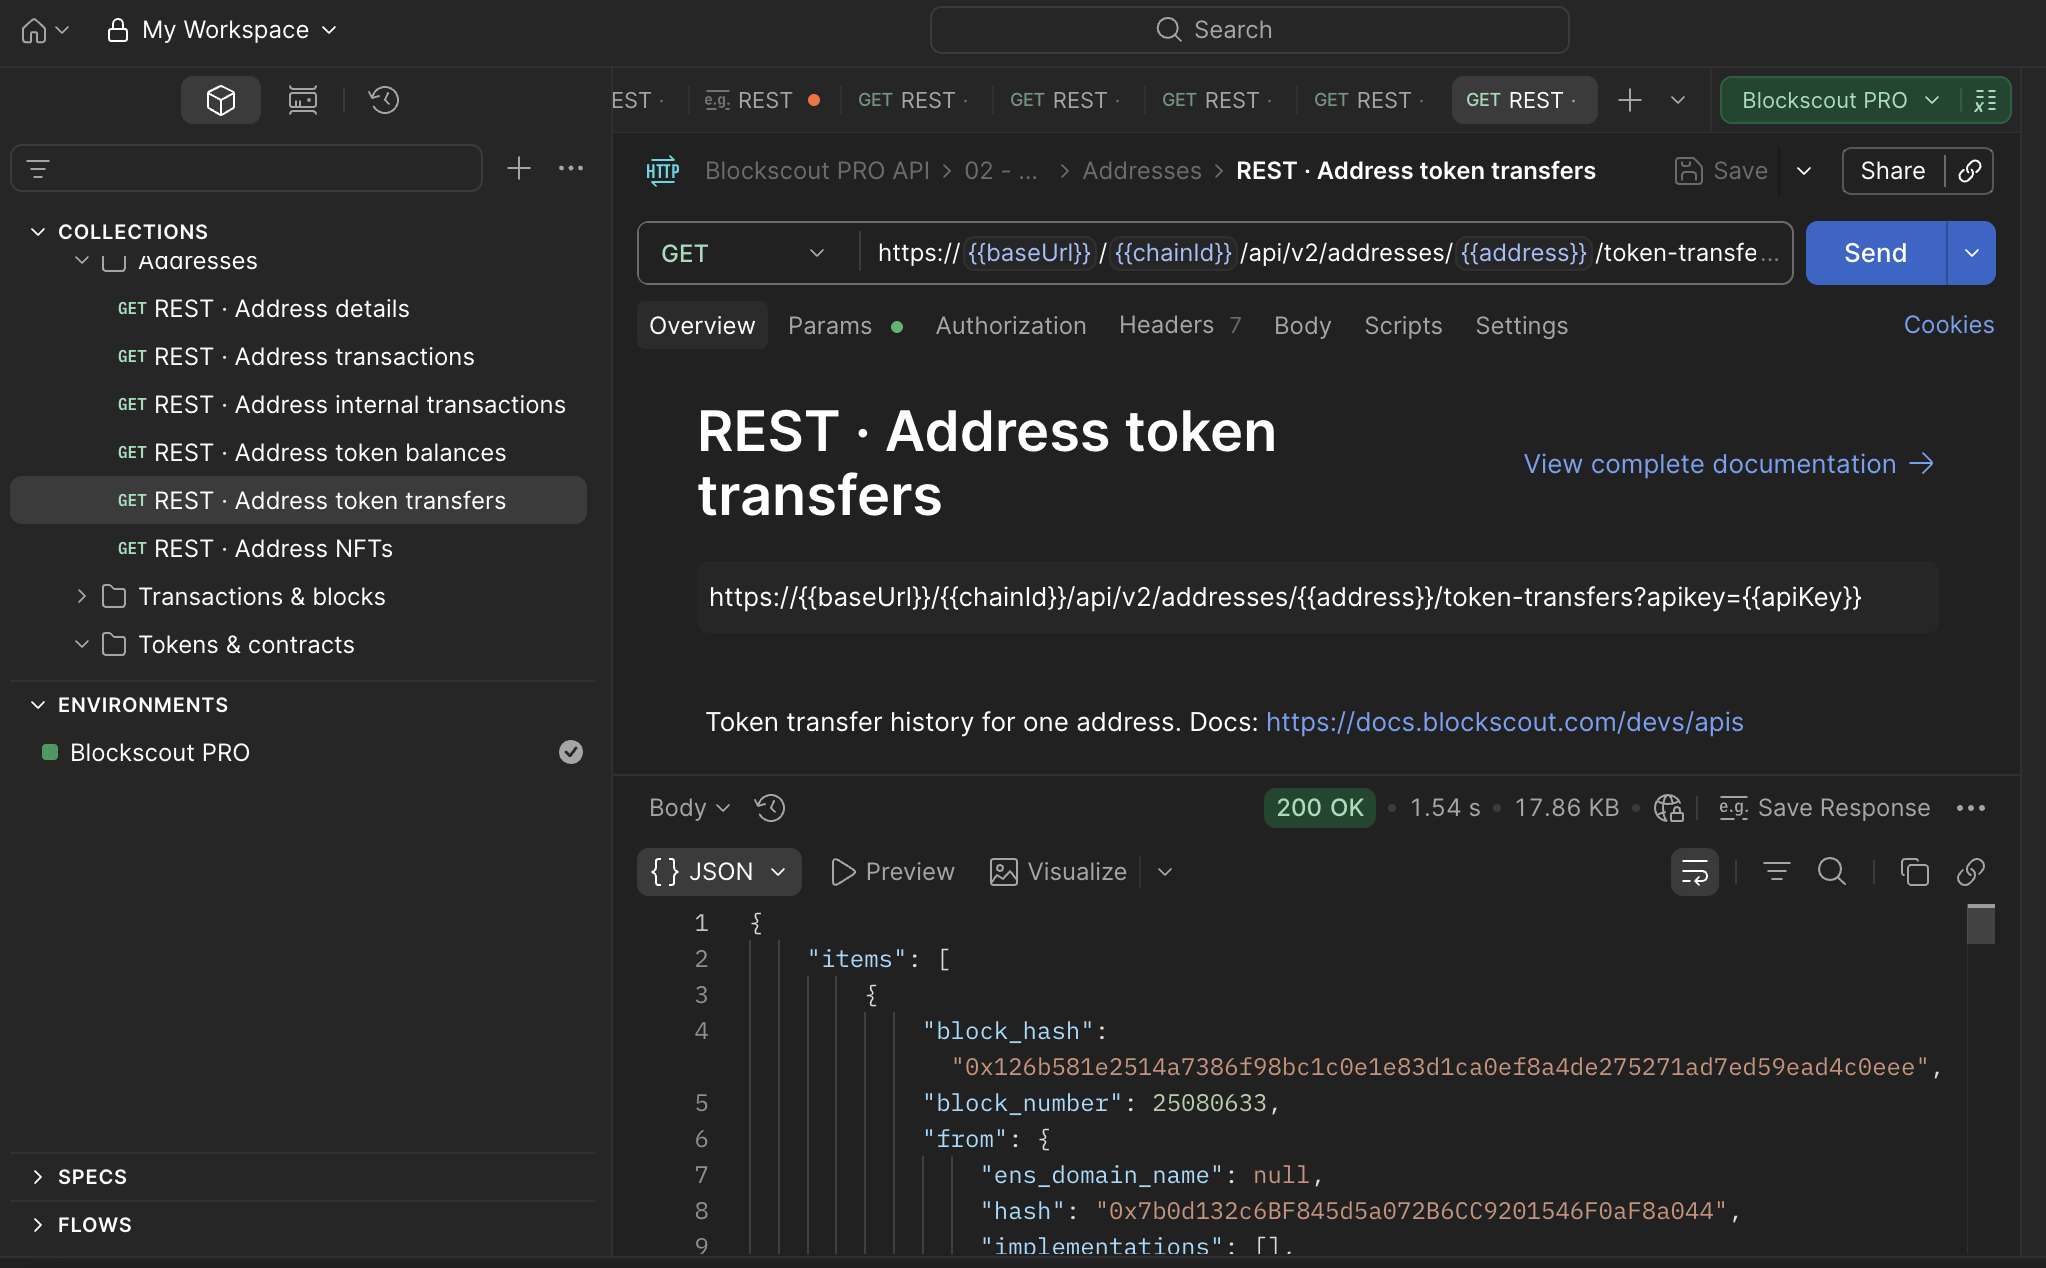
Step 5: Handle pagination
All list endpoints return 50 results by default. When there are more, the response includes a next_page_params object at the end of the JSON body:
{
  "items": [ ... ],
  "next_page_params": {
    "block_number": 22107432,
    "index": 12,
    "items_count": 50
  }
}
To fetch the next page, append those exact parameters to your query. In Postman, paste them into the Params tab:
GET https://api.blockscout.com/10/api/v2/addresses/0x.../transactions
    ?block_number=22107432&index=12&items_count=50&apikey={{apiKey}}
Keep replacing next_page_params with whatever the latest response returns. When the field is absent, you've reached the end of the result set. Blockscout uses keyset pagination, also called cursor pagination, rather than offset-based pagination. This means page 100 is exactly as fast to fetch as page 1, because the database seeks directly to the cursor position rather than skipping N rows. For addresses with thousands of transactions (common on Ethereum mainnet), this design makes exhaustive data collection practical without timeouts or degrading query performance. In Postman, update the Params tab with each new next_page_params object rather than editing the URL string directly.
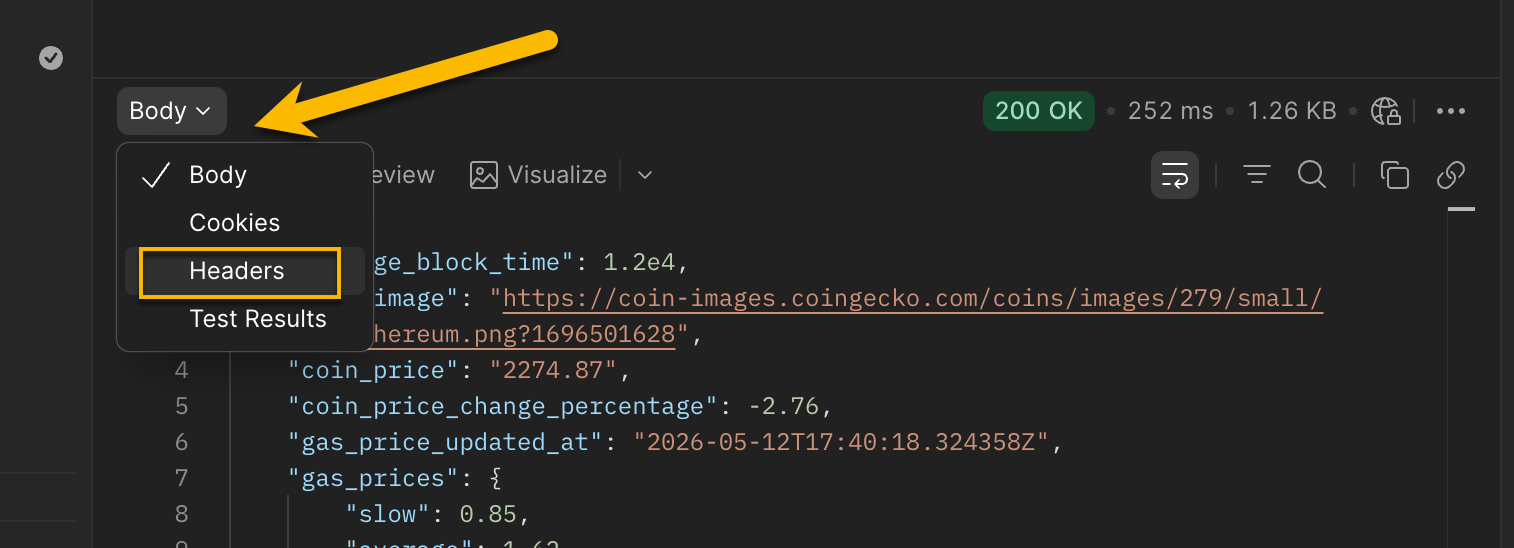
Verify it worked
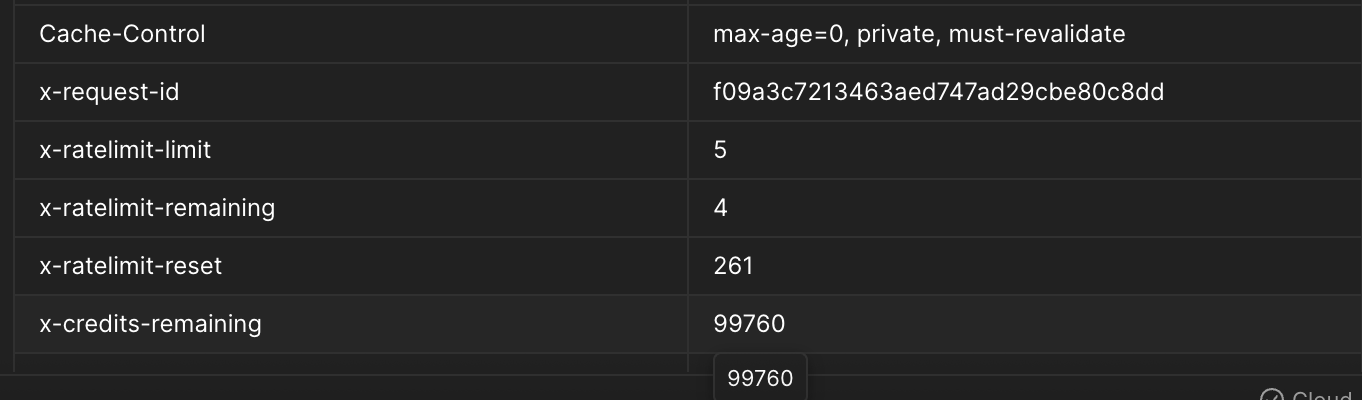
After any successful request, check the Headers tab in Postman. The Pro API includes three response headers that confirm your integration is healthy and let you monitor consumption in real time. x-credits-remaining shows how many credits are left in the current window, either today for the free plan, or the current calendar month for paid plans. x-ratelimit-limit shows your plan's maximum requests per second (5 for free, 15 for Builder, 30 for Pro, 50 for Business). x-ratelimit-remaining shows how many requests you can still fire in the current one-second window before the limiter kicks in.
If x-credits-remaining decreases with each call, your API key is authenticating correctly and credits are being consumed as expected. If the value stays static or you see a 401 Unauthorized response, double-check that the api_key environment variable in Postman matches the key shown in your dev.blockscout.com dashboard. If you hit a 429 Too Many Requests, you've exceeded the RPS limit. Add a short delay between requests or upgrade your plan.
Next steps
The Postman collection covers the full Pro API surface, not just the three endpoints in this guide. Other folders worth exploring: smart_contracts (read any contract's public state with decoded ABI, verify source code), internal_transactions (trace ETH movements between contracts within a single transaction), stats (network-level metrics like daily transaction count and average gas price), and search (resolve an ENS name, contract, or token by keyword in a single query). Change chainId in your Postman environment to jump to a different network. The same collection works against all 3,000+ chains Blockscout indexes, from Ethereum mainnet to small app-chains, with the same key and the same request format.
If you're coming from Etherscan, migrating is mostly a base URL swap. The Blockscout Pro API supports the same module/action RPC pattern Etherscan uses, at https://api.blockscout.com/v2/api?chain_id={chainId}&module=...&action=...&apikey=.... The Etherscan migration guide maps the most common account, contract, logs, and proxy endpoints side by side.
For AI-native workflows, the Blockscout MCP Server exposes the same Pro API data as structured tools that Claude, GPT-4o, and other models can call directly. No HTTP client, no Postman, and no manual JSON parsing required.
Get a free Pro API key
100K credits per day, 5 RPS, no credit card required.