A Deep Dive into Smart Contract Exploration
Explore how to analyze smart contracts across Ethereum and Layer 2s. Learn deployment types, proxy patterns, factory contracts, and how Blockscout reveals onchain behavior and origins

Smart contracts are essential to the functionality of programmable blockchain networks, starting with Ethereum and extending to its vast Layer 2 ecosystem of chains including Optimism, Base, Celo, and 100s of others. Smart contracts automate agreements, manage assets, and power everything from DeFi protocols to NFT marketplaces.
Whether you're conducting security research, performing due diligence, investigating suspicious activity, or simply wanting to understand how a protocol operates, it's vital to have access to the underlying contract code. Transparent contract code allows you to examine the contract's deployment history, transaction patterns, source, verification status, and operational behavior.
This is where Blockscout becomes invaluable for comprehensive contract analysis. Rather than relying on surface-level information, Blockscout enables deep investigation into contract origins, developer activity, operational patterns, and the broader ecosystem context that shapes how contracts function in practice. these features are all included when you launch a custom block explorer with our Autoscout service.
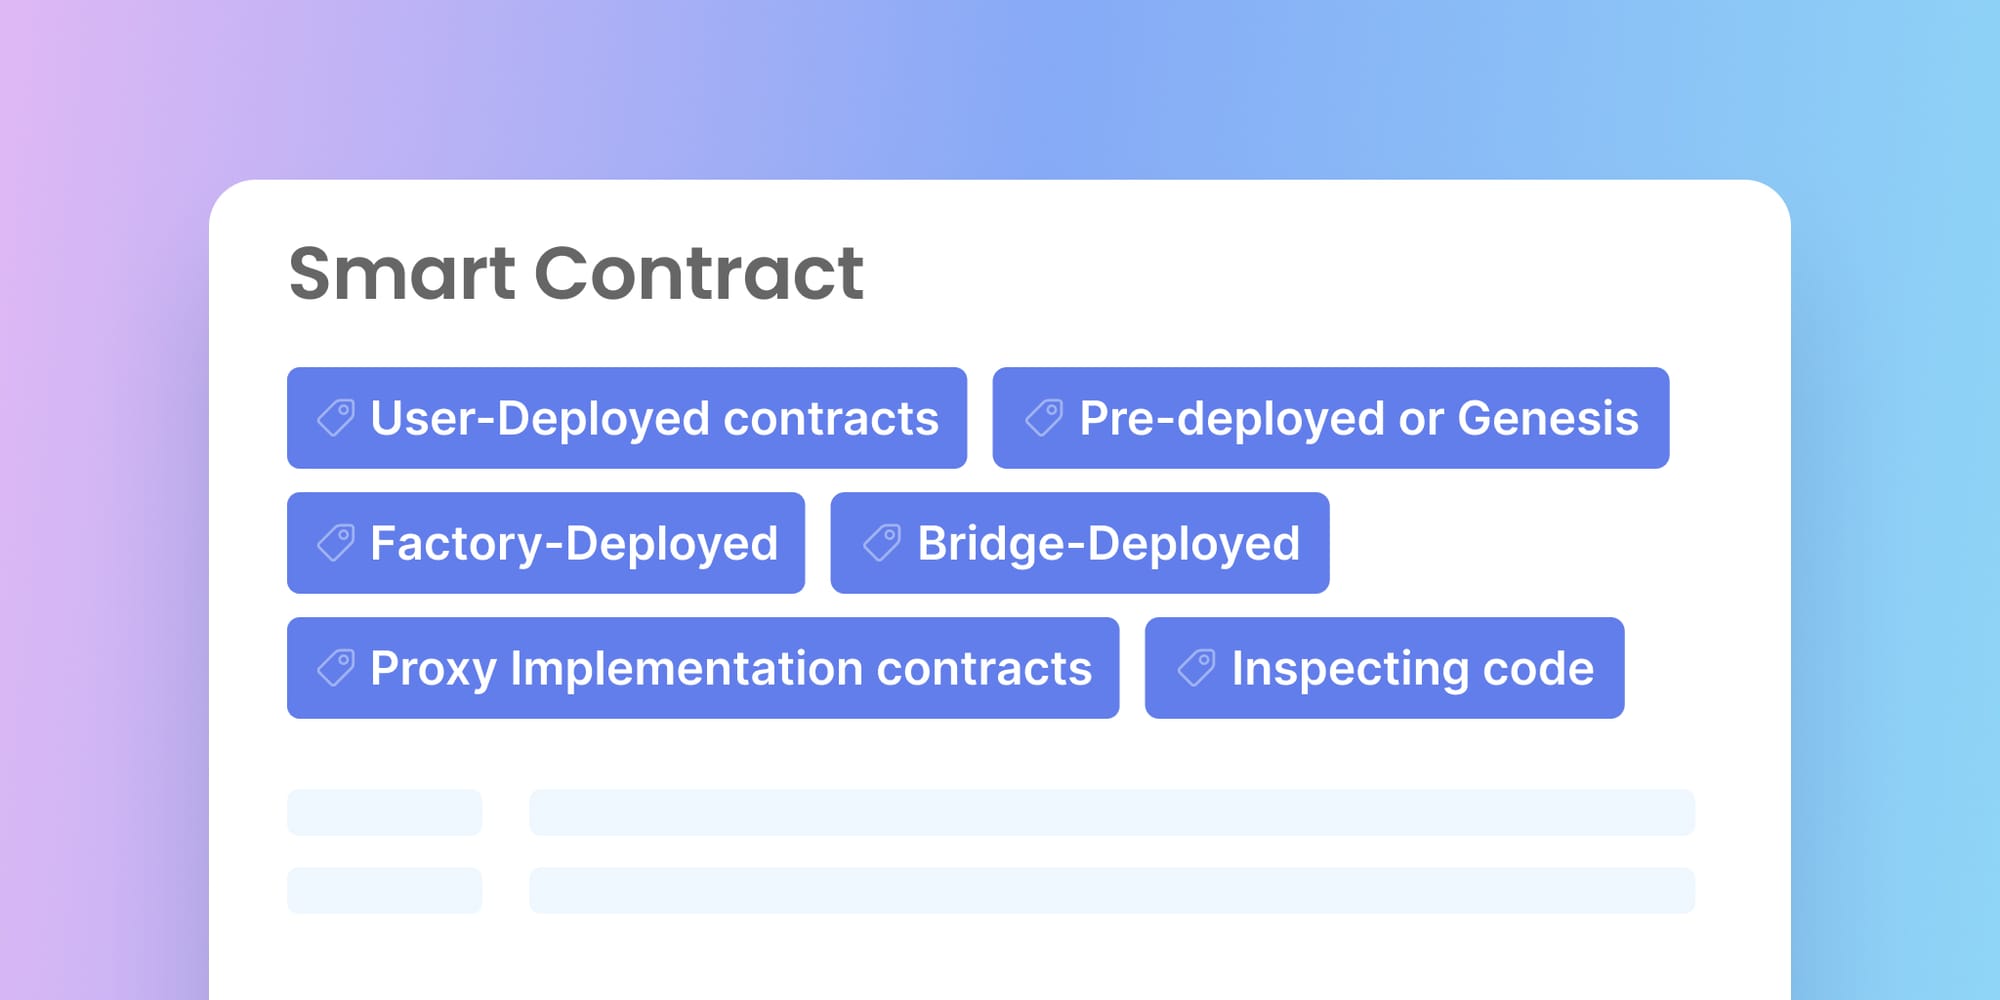
Contract Deployment Categories on EVM Chains
Smart Contract deployment methods vary widely; in the following sections, we will explore each category in detail and examine its mechanics.
User-Deployed Contracts
User-deployed contracts represent the most accessible entry point for smart contract deployment. Individuals or teams use Externally Owned Accounts (EOAs), essentially standard wallets, to launch contracts directly onto the chain.
The user deployment process involves writing code (most commonly Solidity, sometimes Vyper or other languages), compiling it to bytecode, and broadcasting a transaction that executes the deployment, complete with gas fees paid by the sender.
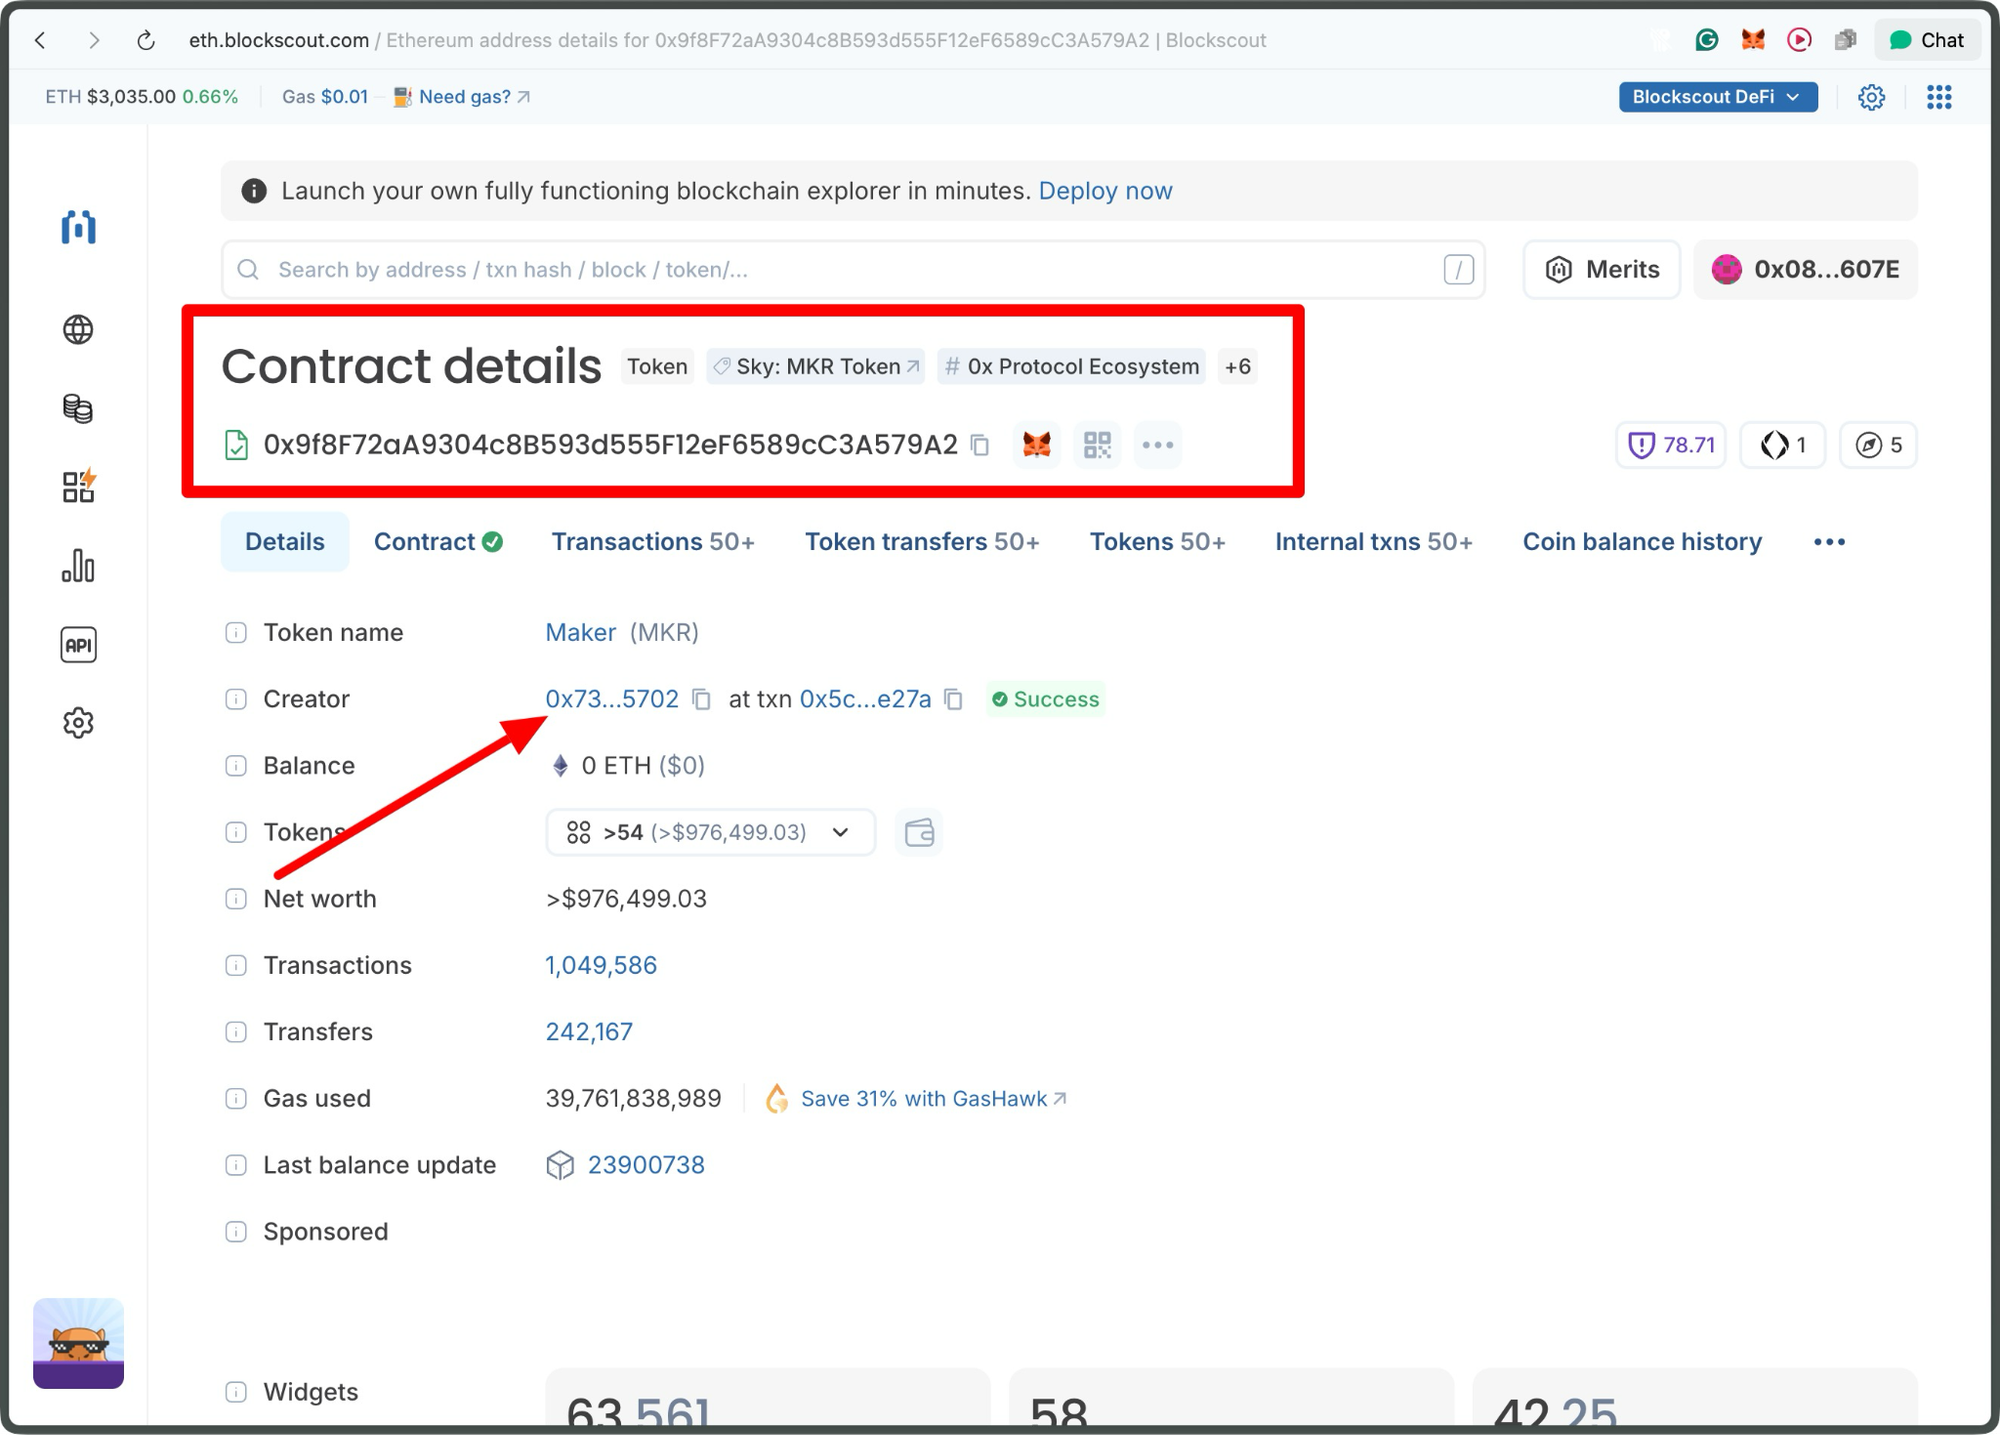
Maker (MKR) Token: 0x9f8F72aA9304c8B593d555F12eF6589cC3A579A2
On Blockscout, these contracts stand out with clear creation transactions, timestamped blocks, and a visible deployer address, allowing easy traceability back to the originating wallet.
Pre-deployed or Genesis Contracts
Pre-deployed contracts are woven into the fabric of a blockchain from its inception, embedded in the genesis block (typically Block 0) or the earliest subsequent blocks during network bootstrapping. Unlike traditional deployments, there's no onchain transaction to inspect; these contracts simply are added as part of the chain's initial state, orchestrated by the protocol's core team to ensure foundational stability.
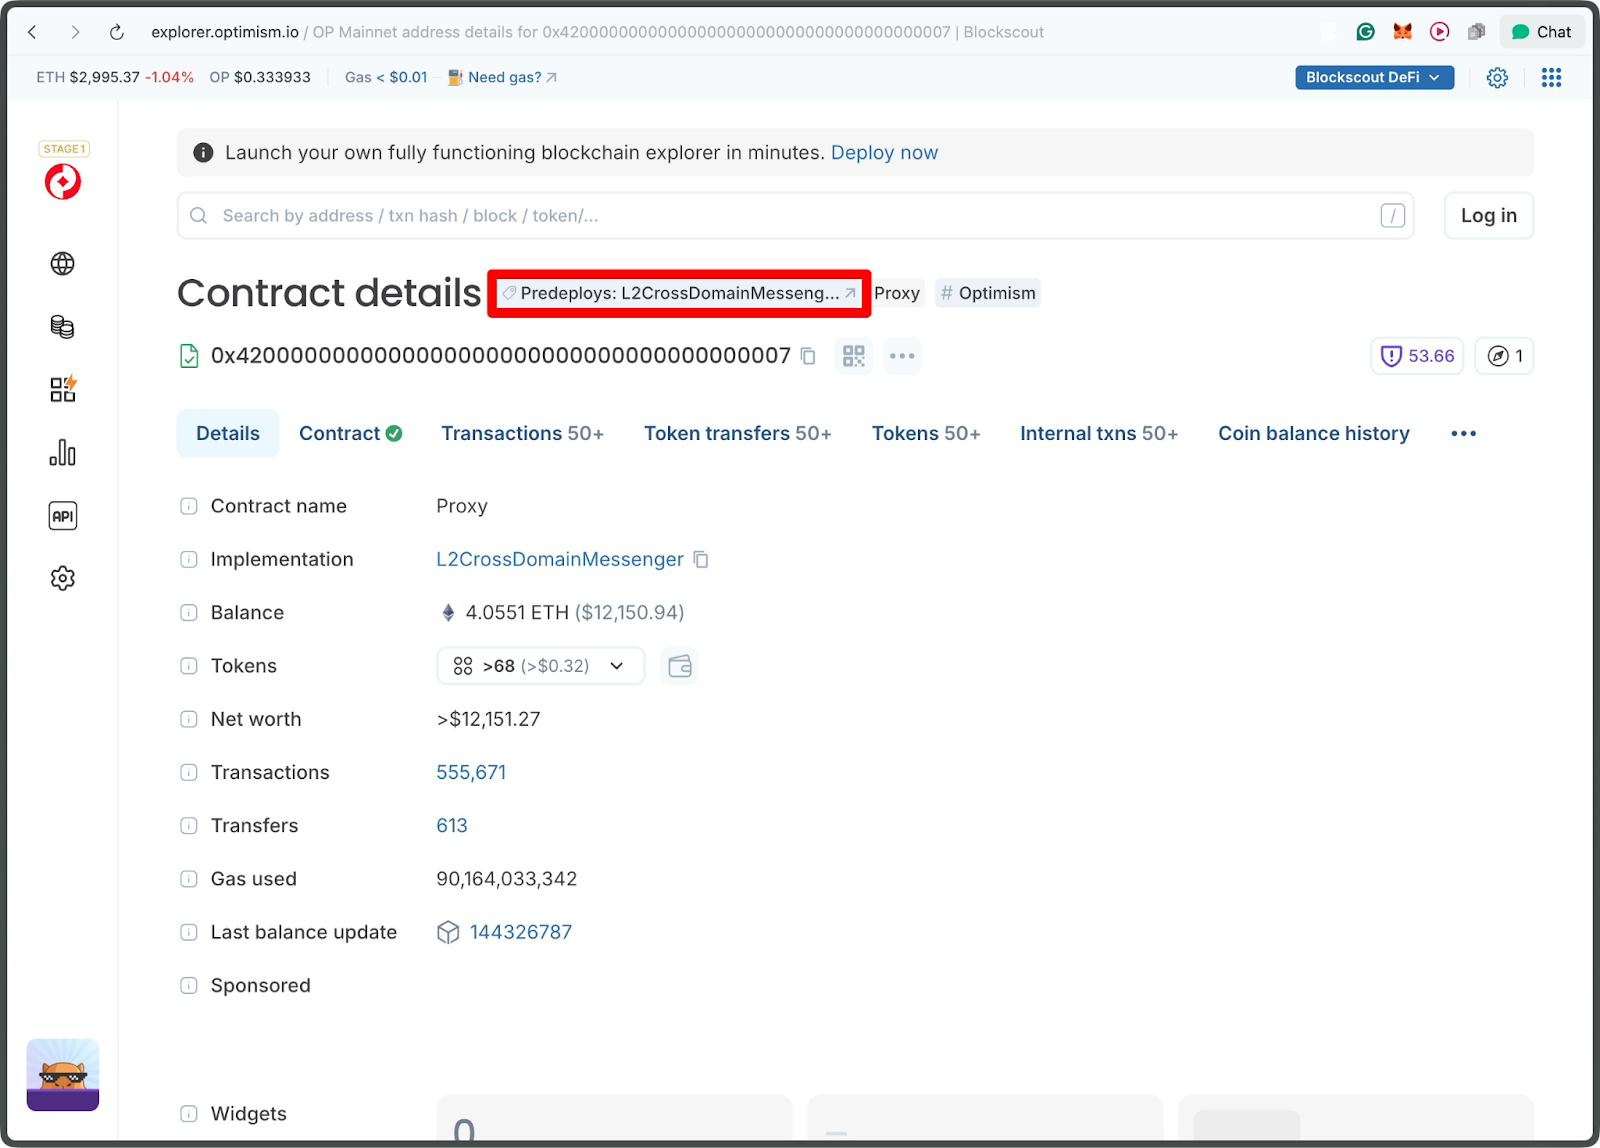
L2CrossDomainMessenger - 0x4200000000000000000000000000000000000007
A prime example is Optimism's suite of contracts starting with 0x42000000..., including the L2 Standard Bridged WETH, which facilitates seamless ETH wrapping without relying on post-launch actions, promoting trust-minimized infrastructure that's battle-tested from day one.
Factory-Deployed Contracts
Factory-deployed contracts introduce a layer of automation and scalability, in which deployment isn't handled by a human-operated EOA but by another smart contract that acts as a "factory," programmatically generating new instances on demand. Each resulting contract still produces a standard creation transaction, but the deployer field points to the factory contract itself rather than a wallet, revealing a nested, efficient architecture.
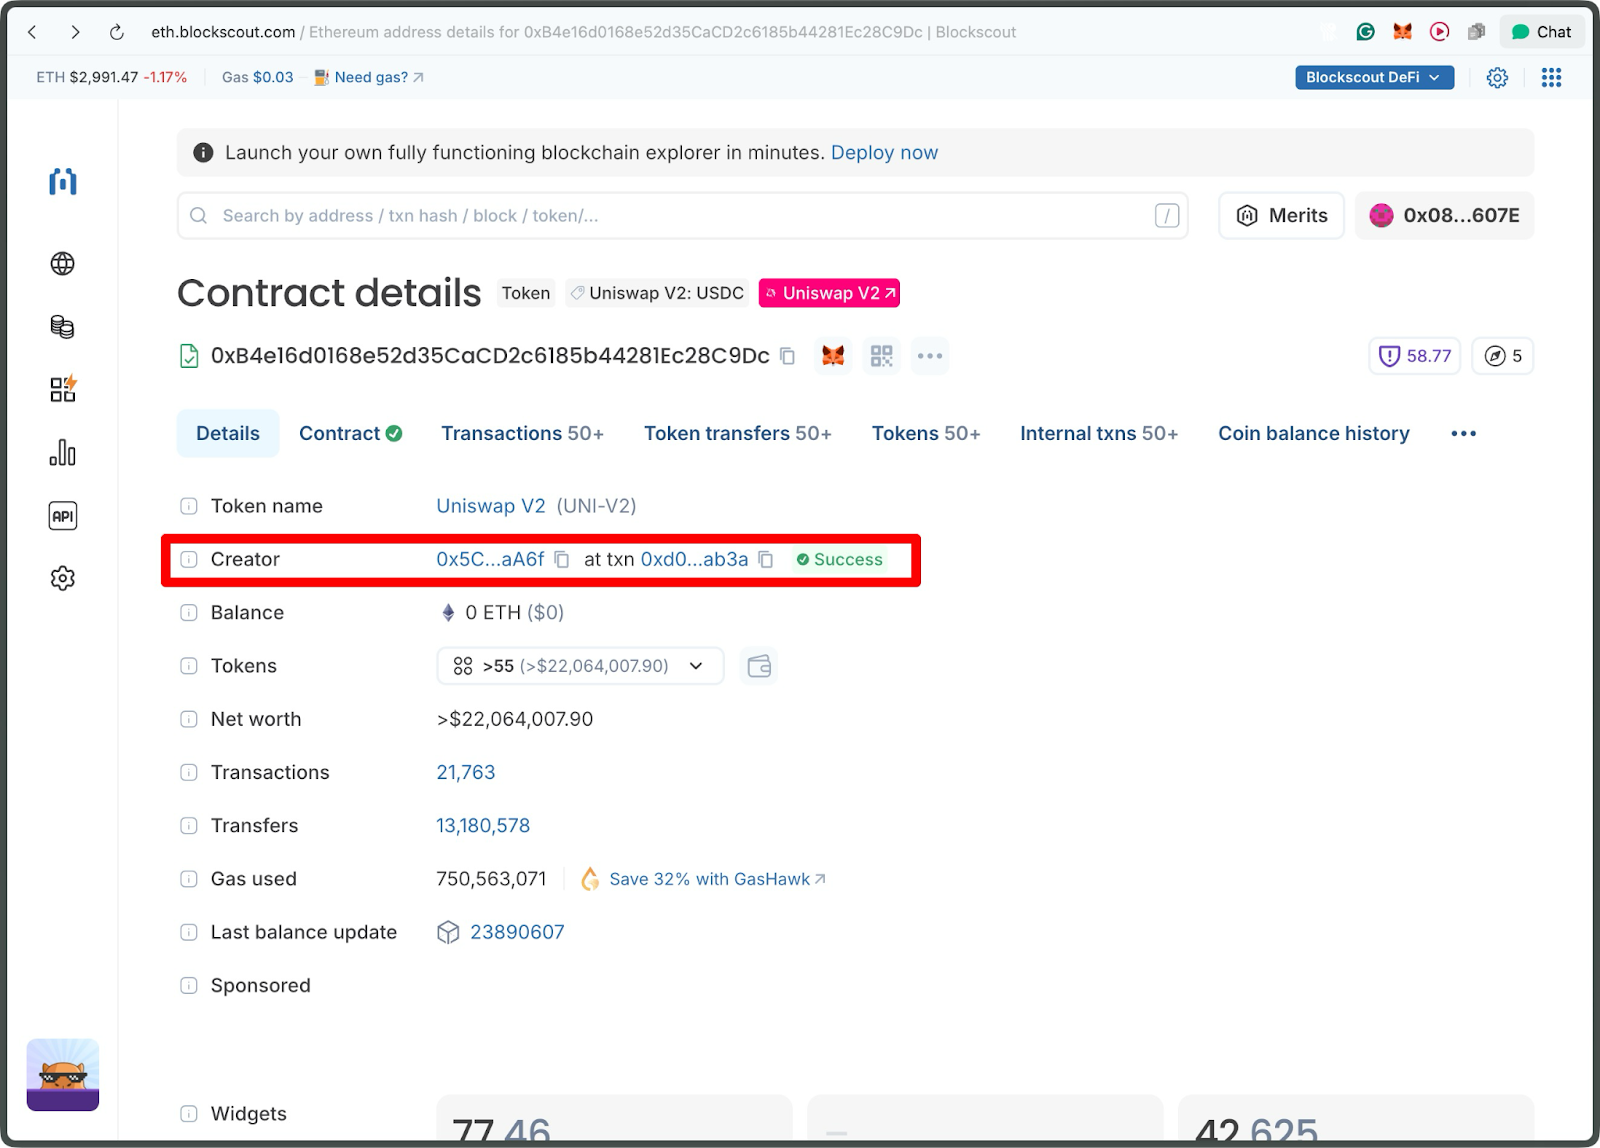
Uniswap V2 USDC/WETH Pair - 0xB4e16d0168e52d35CaCD2c6185b44281Ec28C9Dc
Clicking on the creator address in this case takes you to the parent factory contract.

Proxy Implementation Contracts
Proxy implementation contracts contain the logic that the proxy contracts execute. In upgradeable systems, the proxy contract (the public address everyone uses) delegates all function calls to a separate implementation contract that holds the real functionality.
Aave Pool V3: 0x87870Bca3F3fD6335C3F4ce8392D69350B4fA4E2
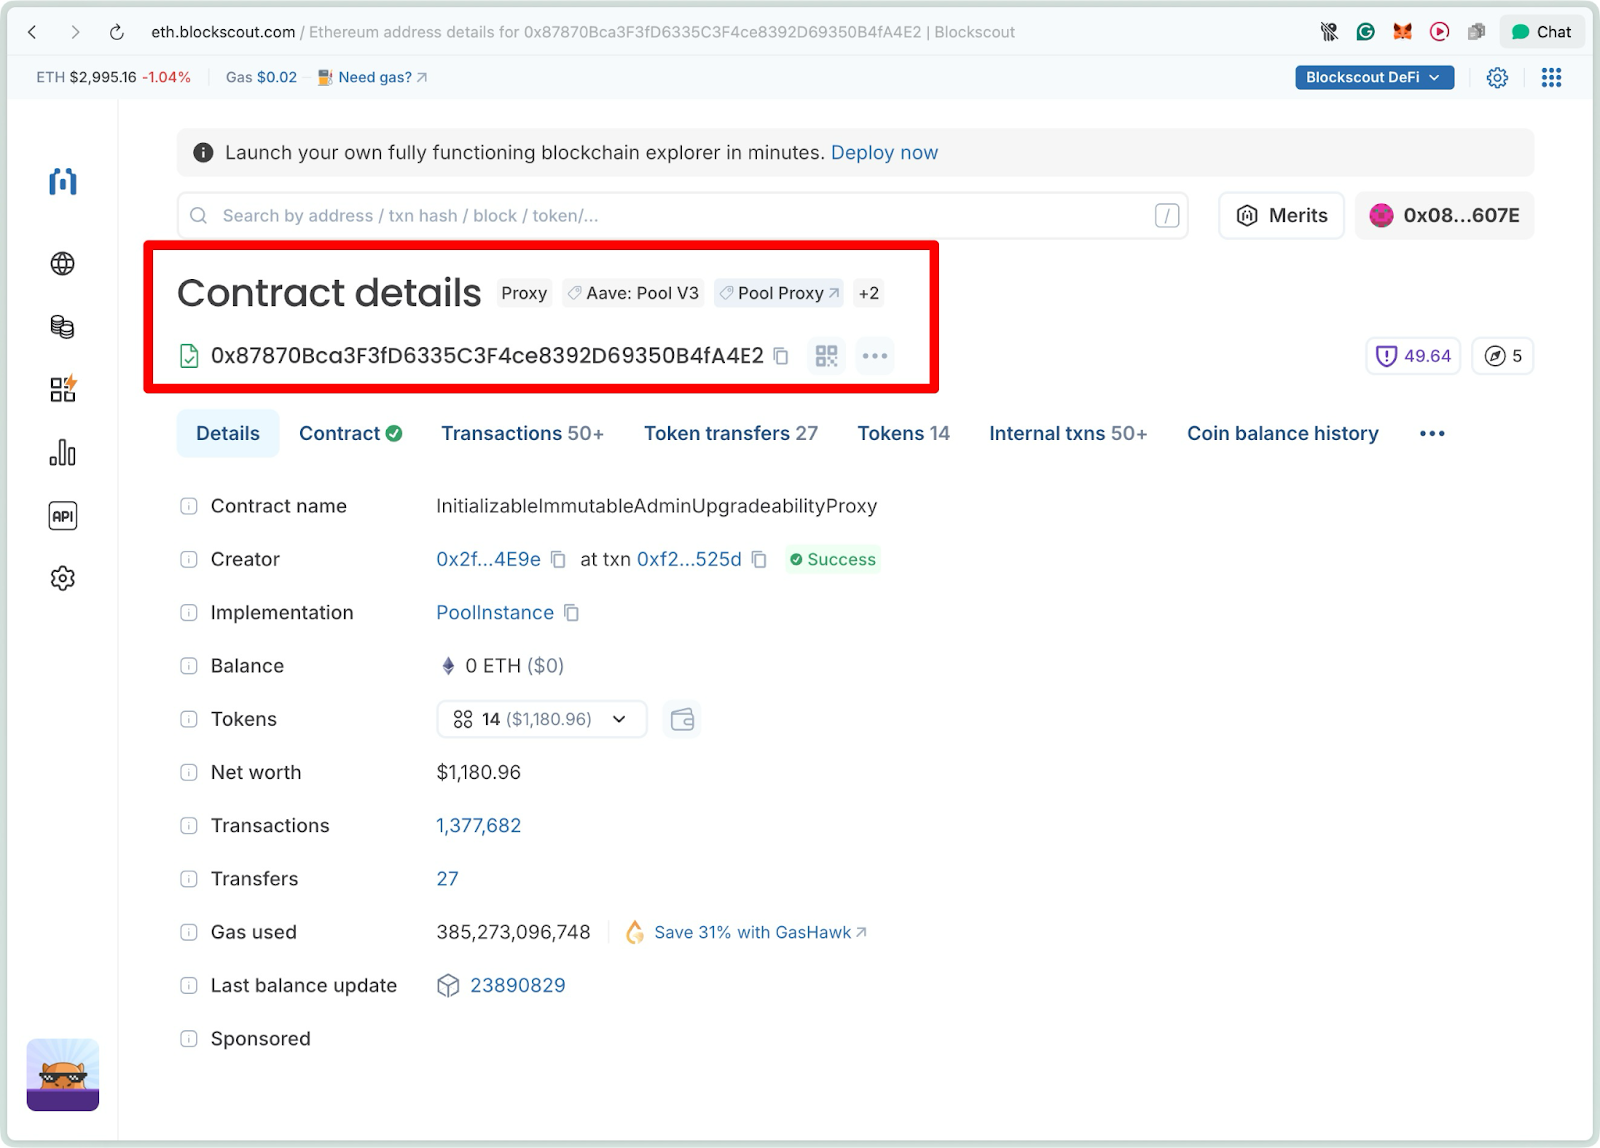
The key insight is that these are deployed as separate contracts. The implementation contract is deployed first, including all the code logic, while the proxy contract is deployed separately and points to the implementation. When users interact with the proxy address, it forwards all calls to the implementation contract behind the scenes.
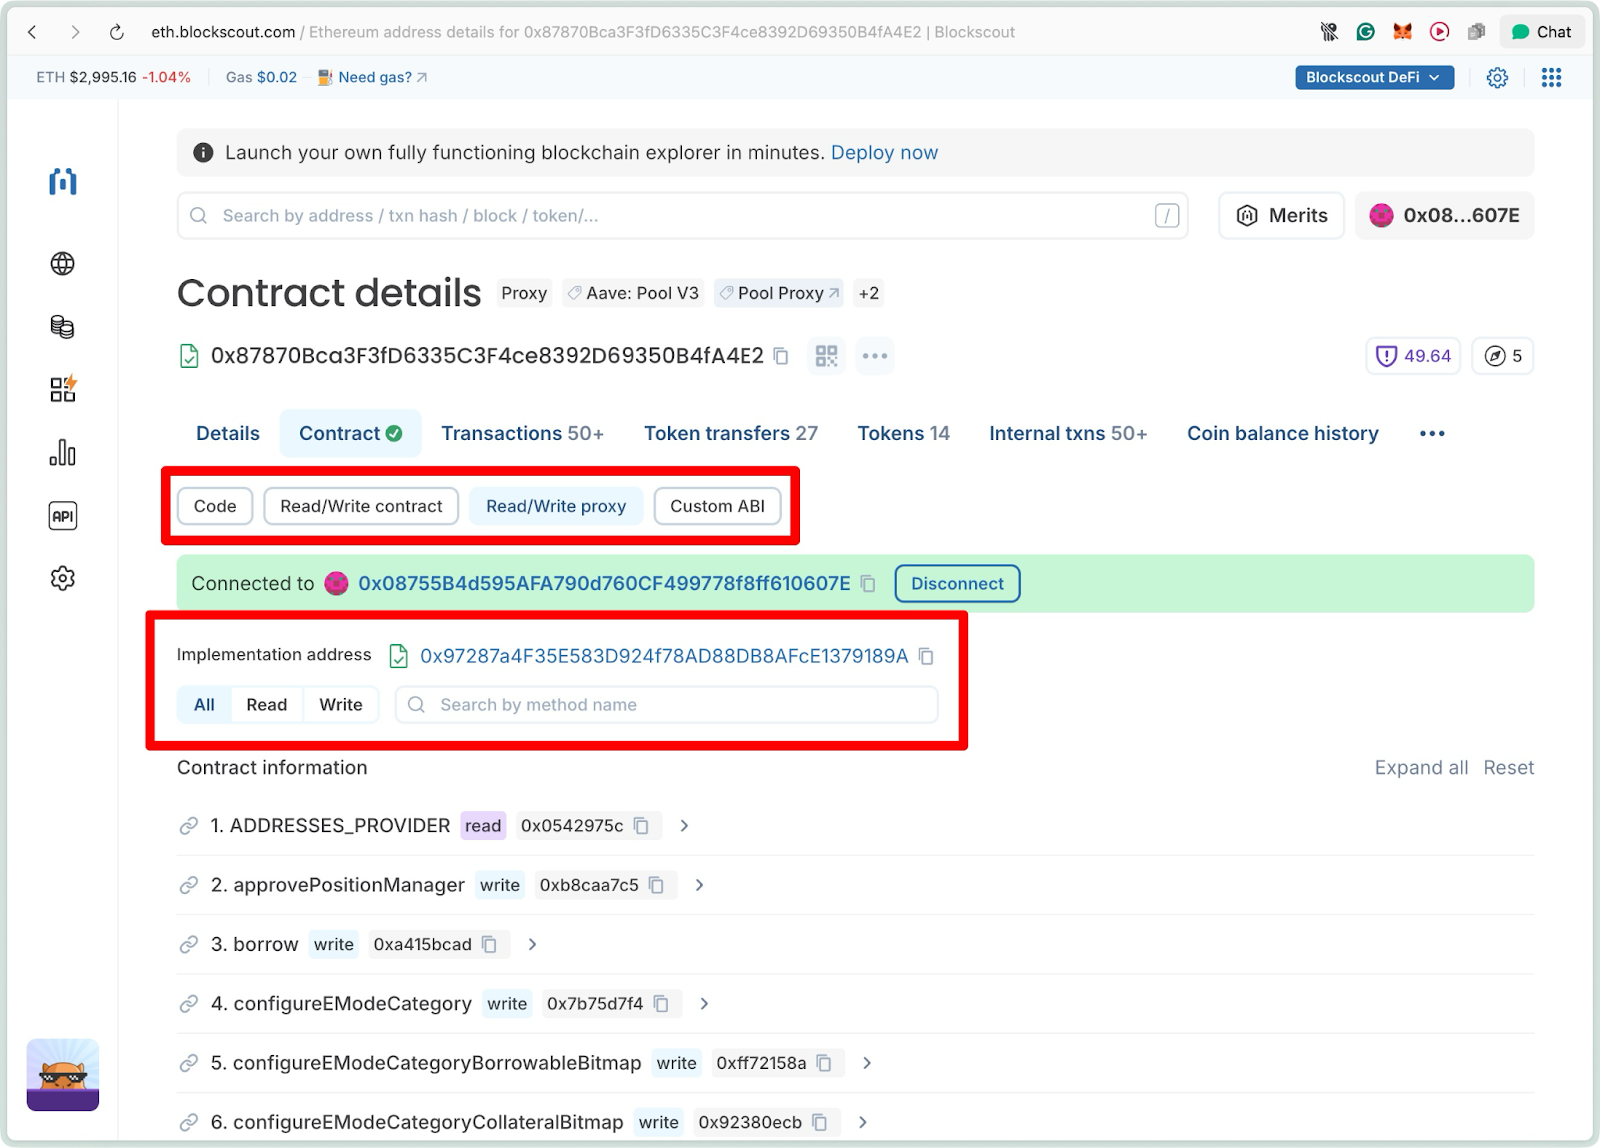
Click the contract tab, then the Read/Write proxy tab to see the Implementation contract.
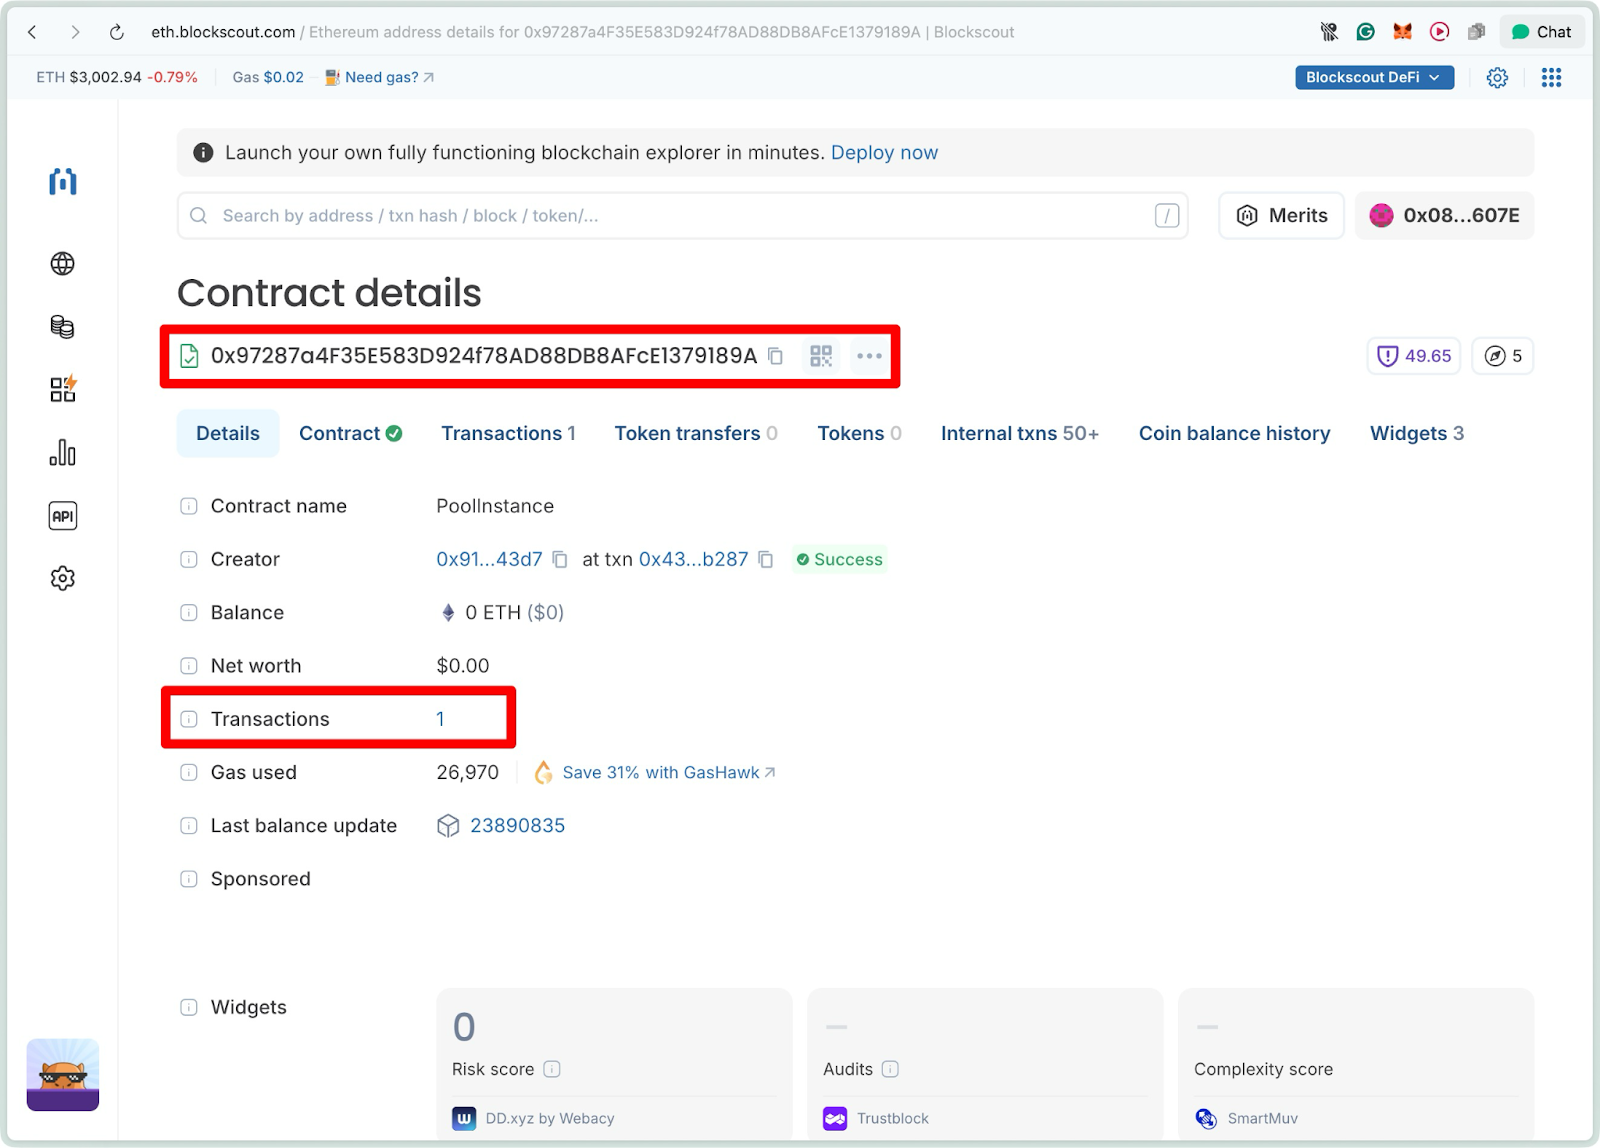
0x97287a4F35E583D924f78AD88DB8AFcE1379189A
On Blockscout, implementation contracts appear as normal deployments with clear creator information. However, to understand the full picture, you need to examine both contracts together. The proxy contract shows the public interface users interact with, while the implementation contract reveals the actual code being executed and who deployed it.
Exploring a User-Deployed Smart Contract
We'll use the Uniswap V3 Factory contract on Ethereum as an example (0x1F98431c8aD98523631AE4a59f267346ea31F984).
This contract, created by the Uniswap team, enables the creation of liquidity pools (a parent Factory contract) for trading pairs and is a cornerstone of DeFi on Ethereum. It's verified on Blockscout using the Blockscout Bytecode Database, which provides automatic partial verification for contracts that match existing deployments in the DB.
Step 1: Navigating to the Contract
Enter the Address: In the search bar at the top of the Blockscout homepage, paste the contract address.
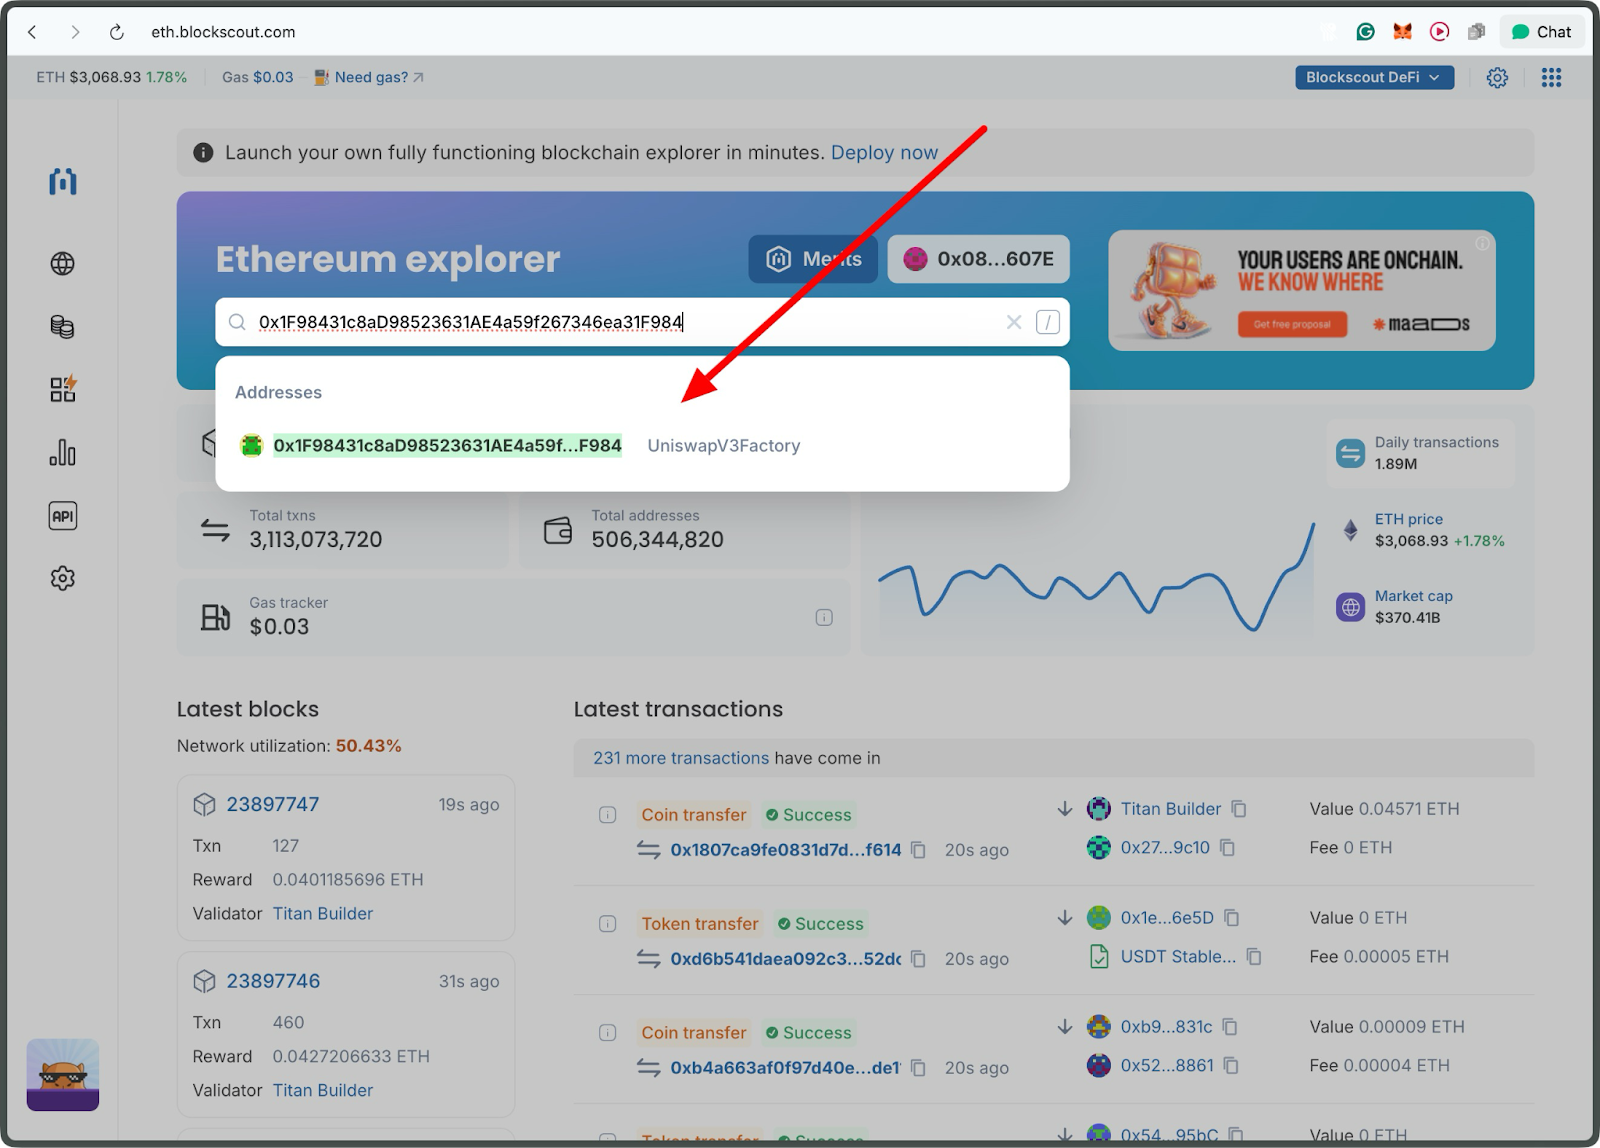
Click the address.
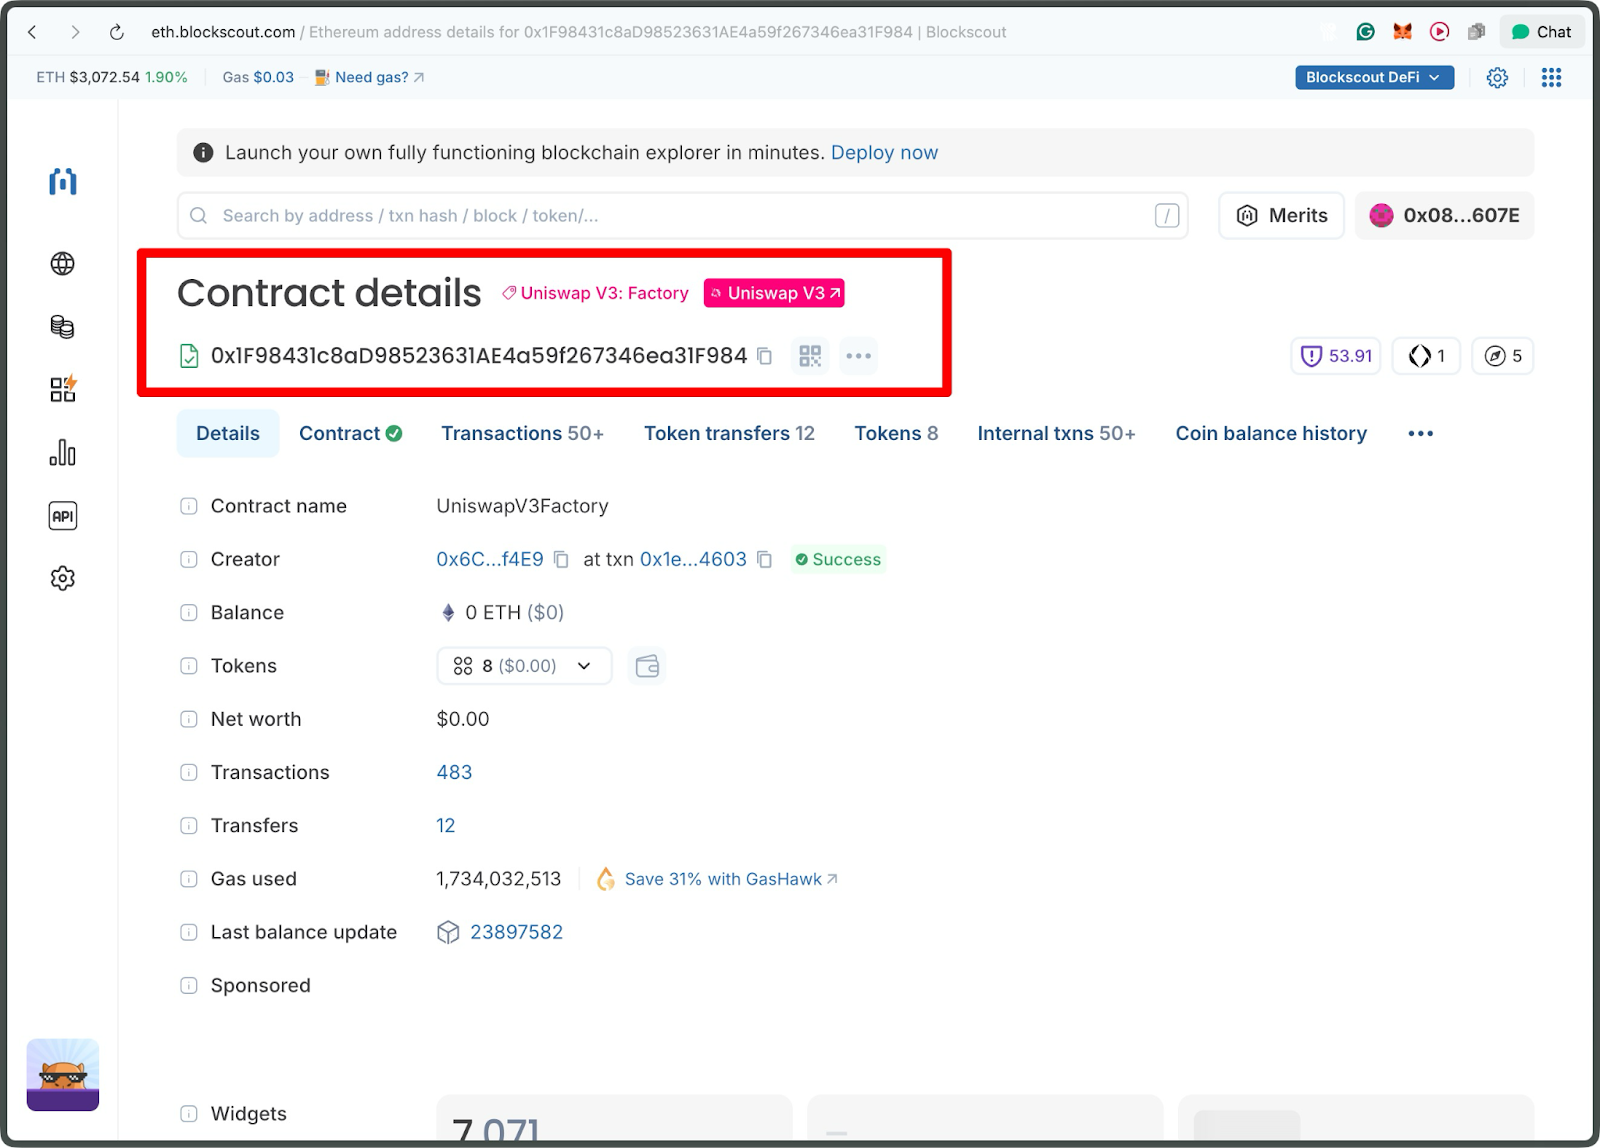
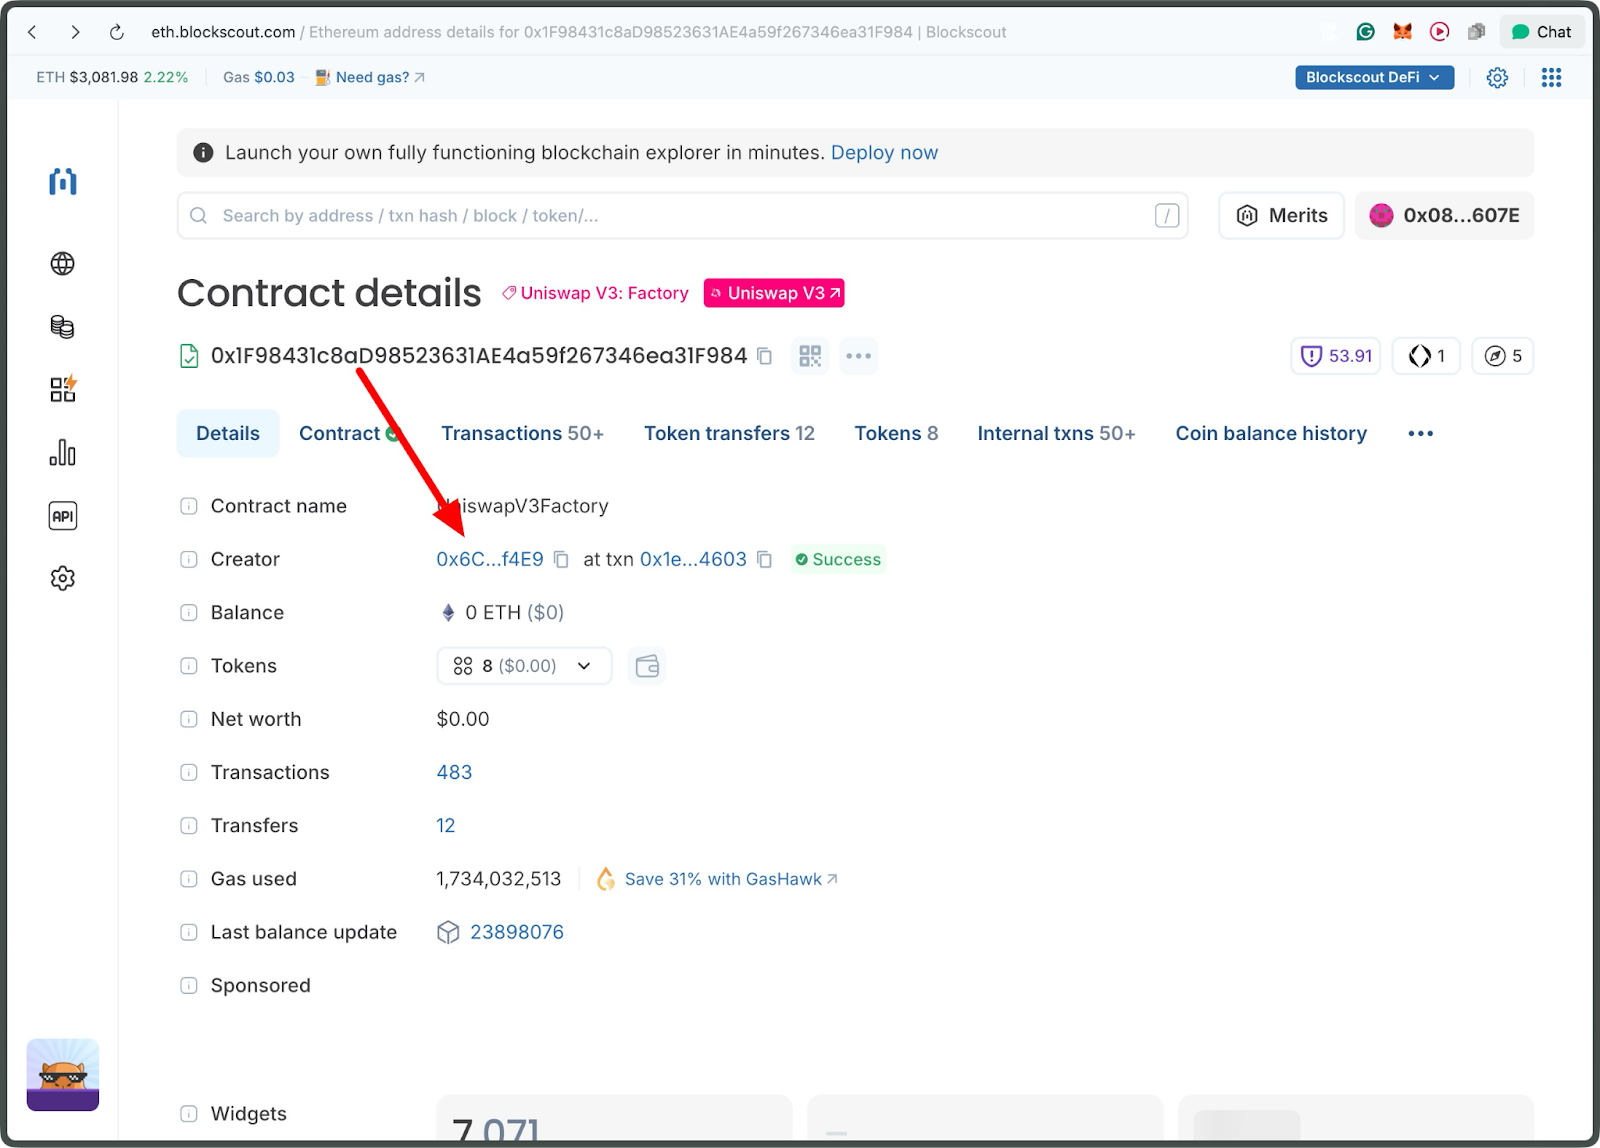
At a glance, the page header shows the contract's unique 42-character hexadecimal address. For our Uniswap V3 Factory example, it's labeled as "Uniswap V3: Factory" with a DeFi protocol icon, indicating its type.
Step 2: Uncovering Deployment Details
Understanding who deployed the contract and when it was deployed reveals its legitimacy and context. This is the starting point of the contract's lifecycle.
On the Creator tab, click the creation transaction to view deployment details.
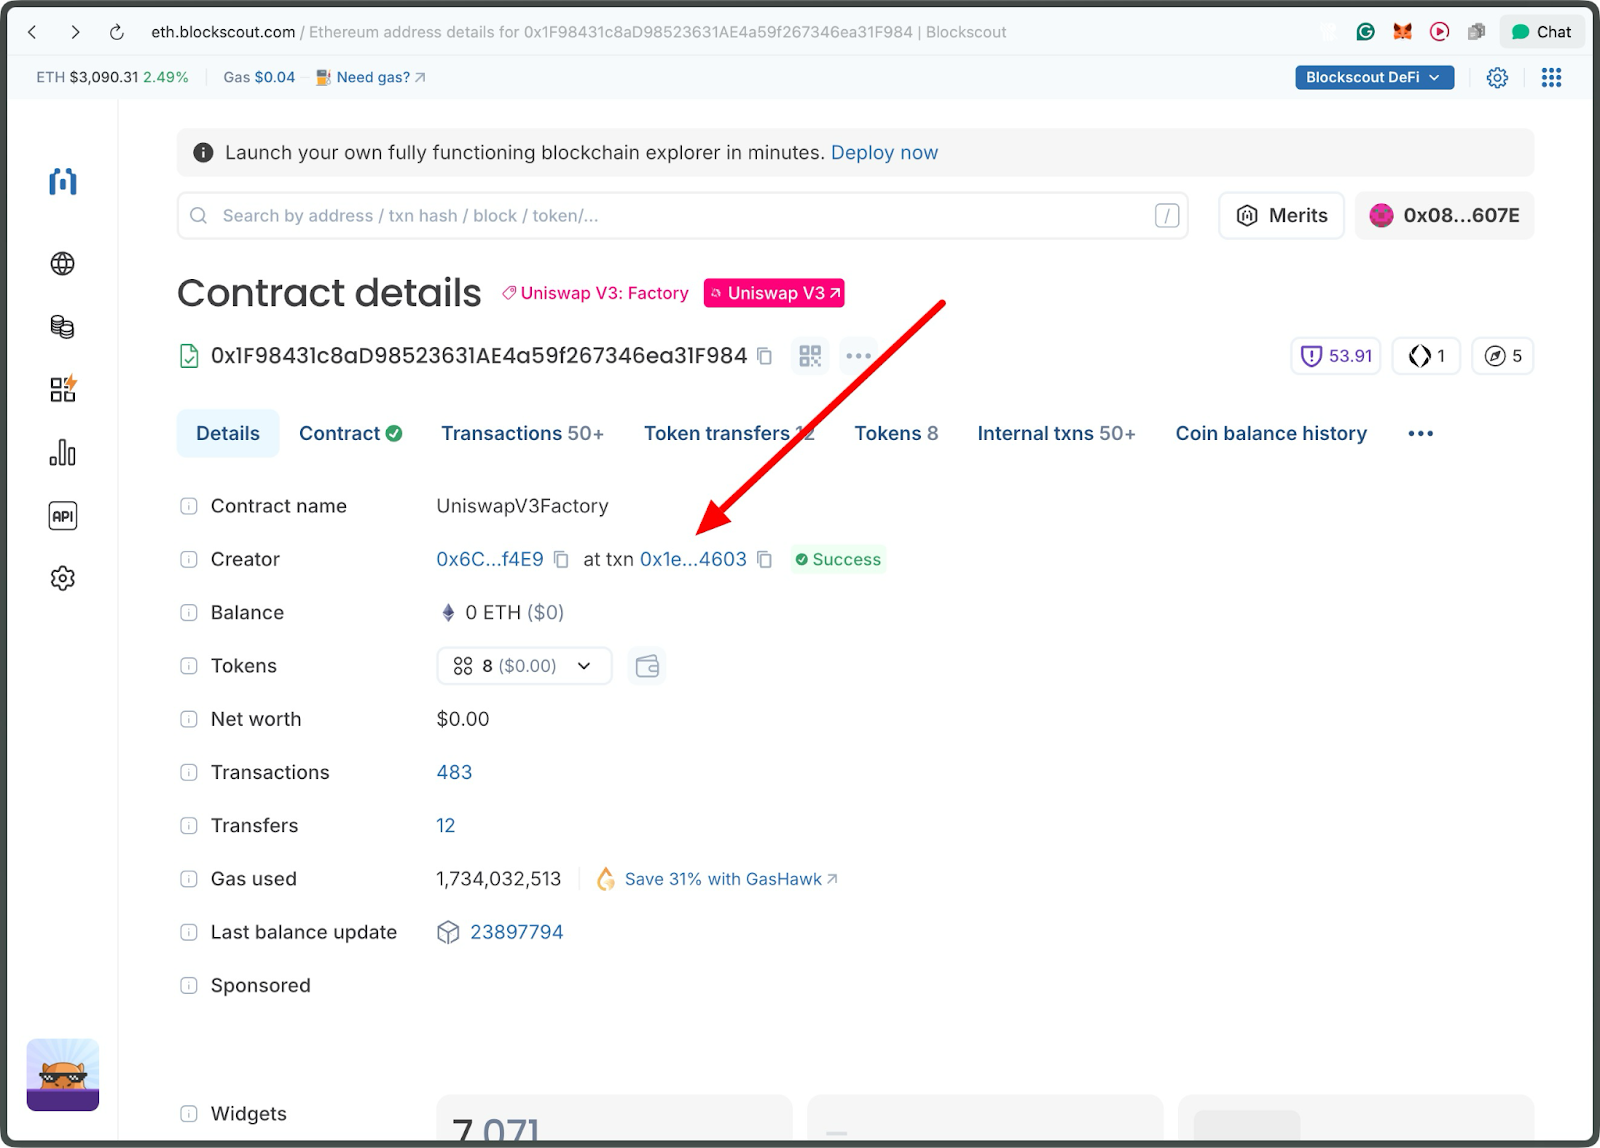
From this page, you can see the transaction details for the deployment.
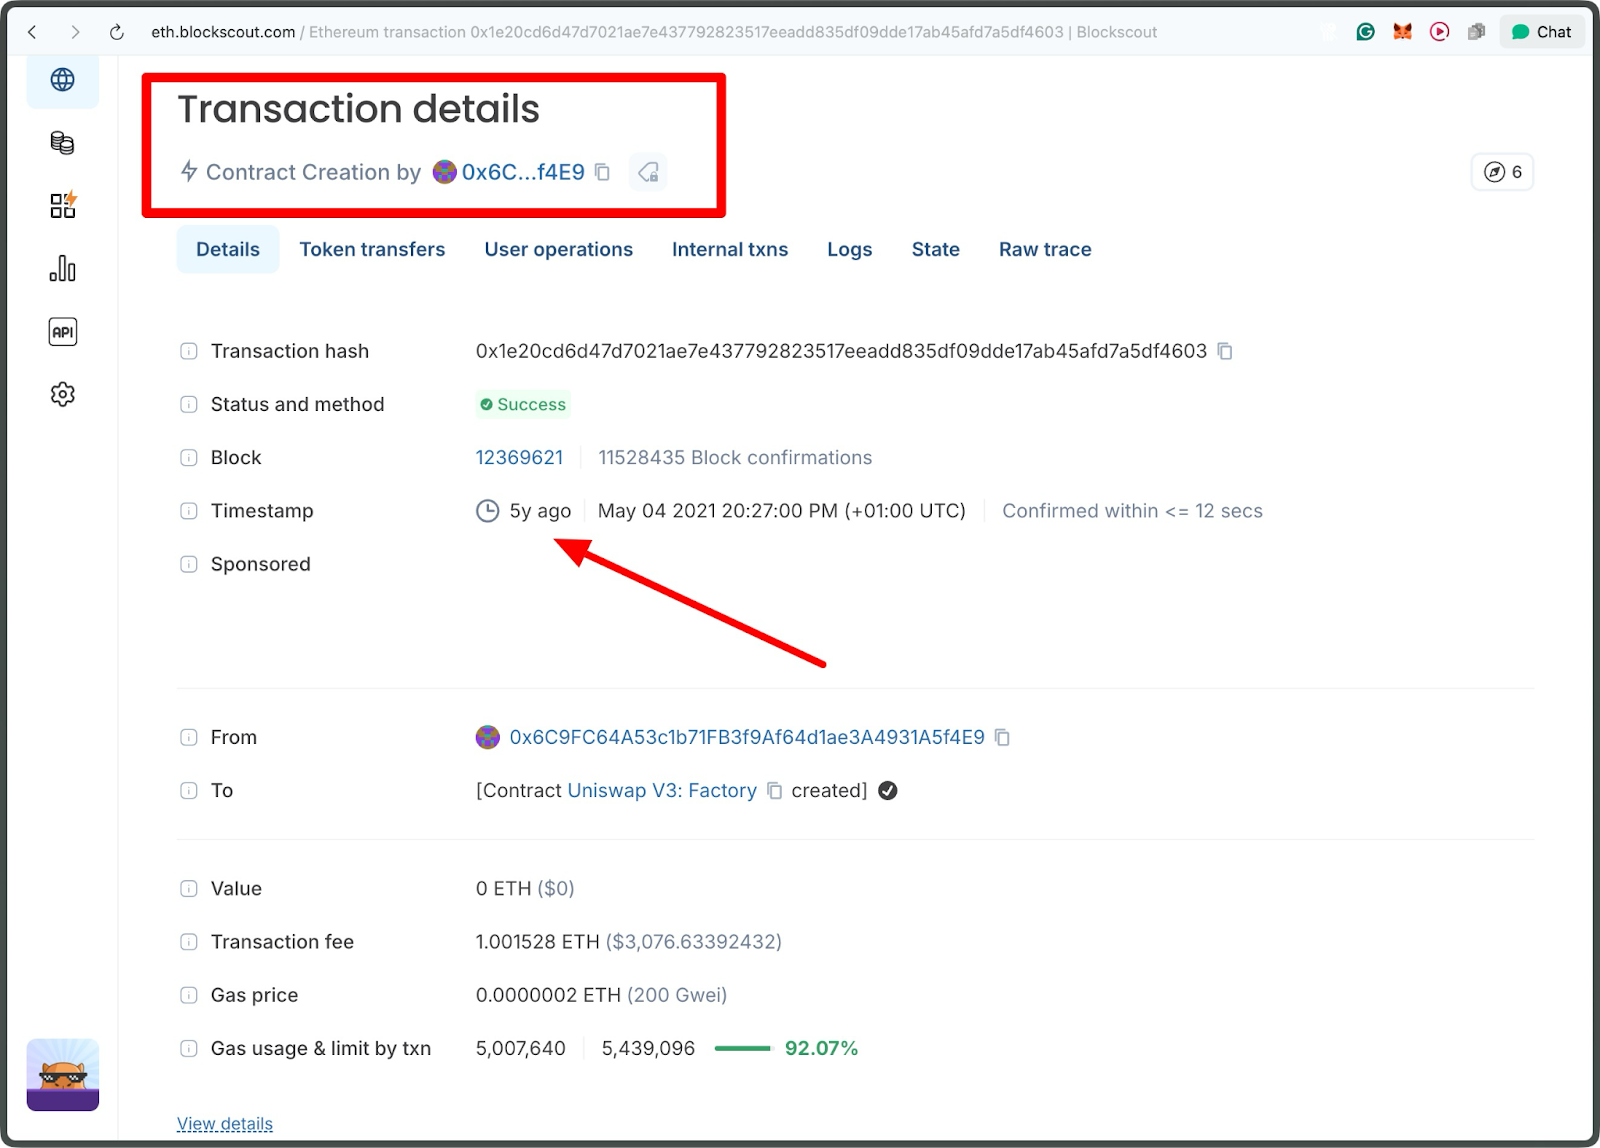
You can view additional details, such as the Block Number and the creation date. This helps assess age and stability. Established contracts, such as the Uniswap V3 Factory (deployed over 5 years ago), suggest maturity, while recent ones might indicate newer projects.
Step 3: Diving into the Deployer's Address
The deployer is often a key figure, such as a project team, a multisig wallet, or even a DAO.
Click the creator address.
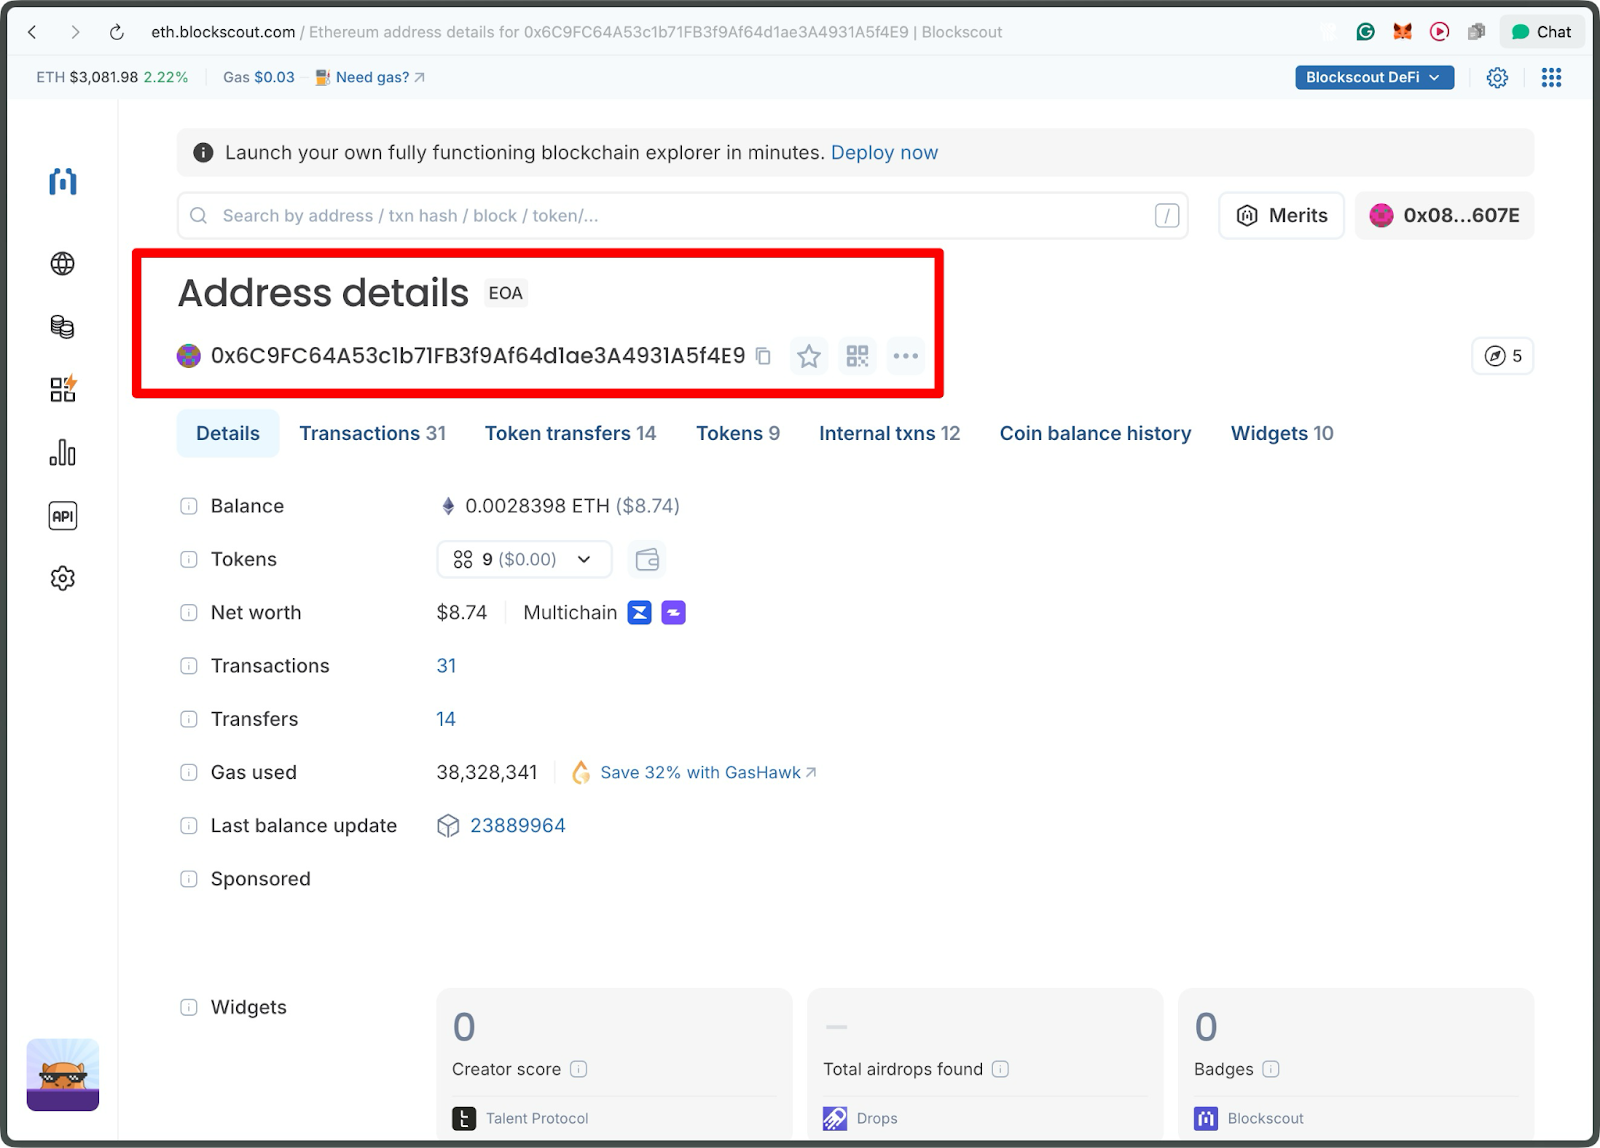
From the address page, you can see the total transactions, tokens, and other details.
Click on the transactions tab to see the history
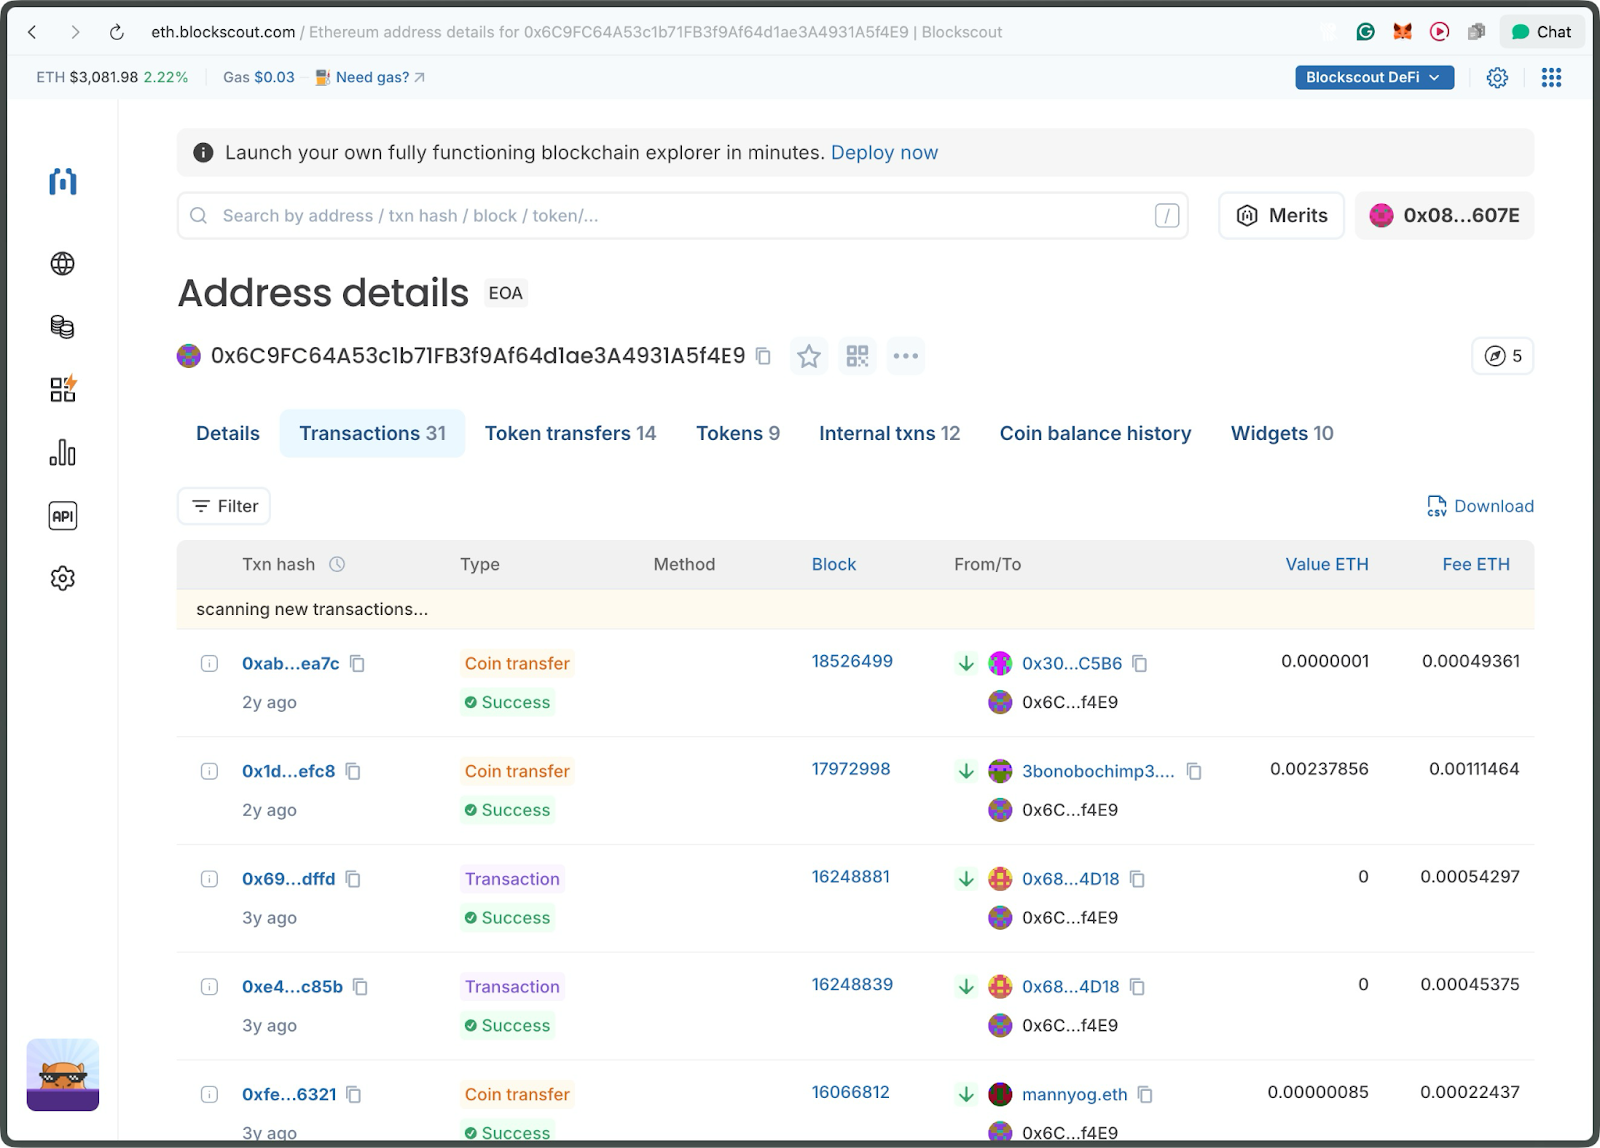
On this page, you can view transactions dating back 5 years and the most recent transaction from 2 years ago.
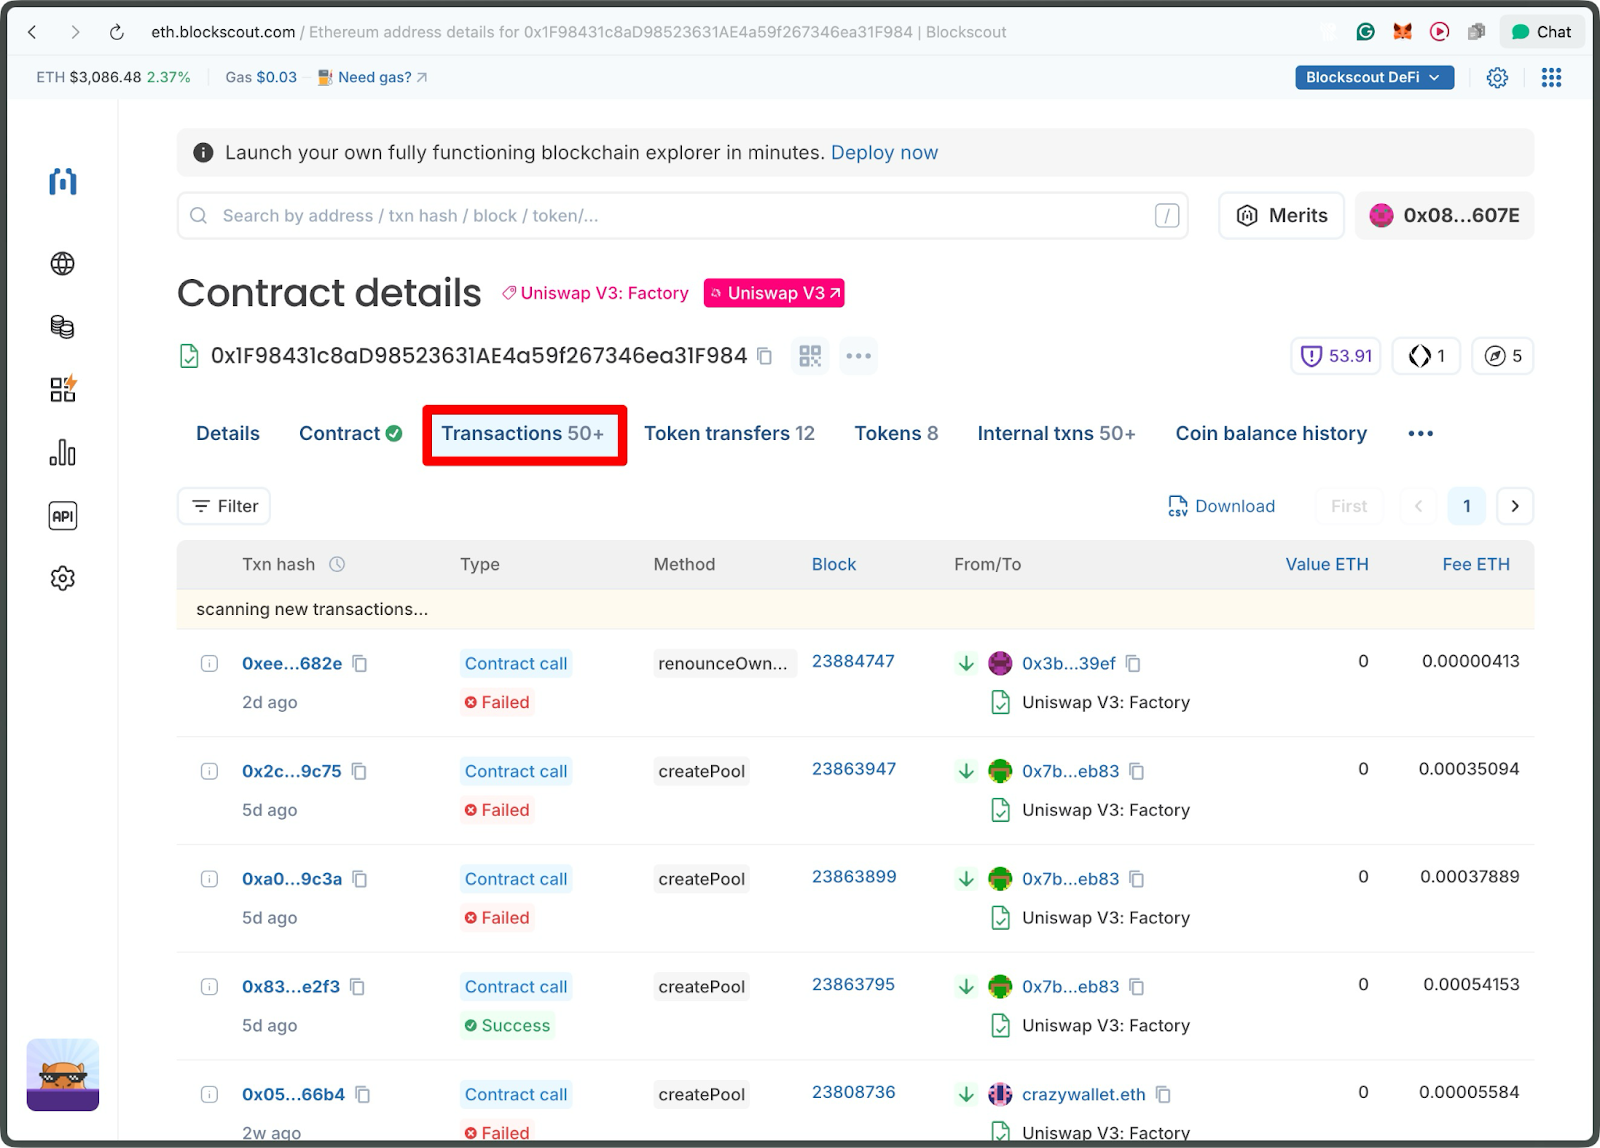
Step 5: Analyzing Transaction Activity
Transactions capture a contract's lifecycle, from initial interactions to daily operations.
Click on the transactions tab. You'll see hundreds of createPool calls, reflecting its role in DeFi trading volume. Low-activity contracts might signal dormancy or rugs; always cross-check with token holders or volume.
Step 6: Inspecting Code
To go beyond history, examine the contract.
Click the contract tab; the green check mark indicates that the contract is verified.
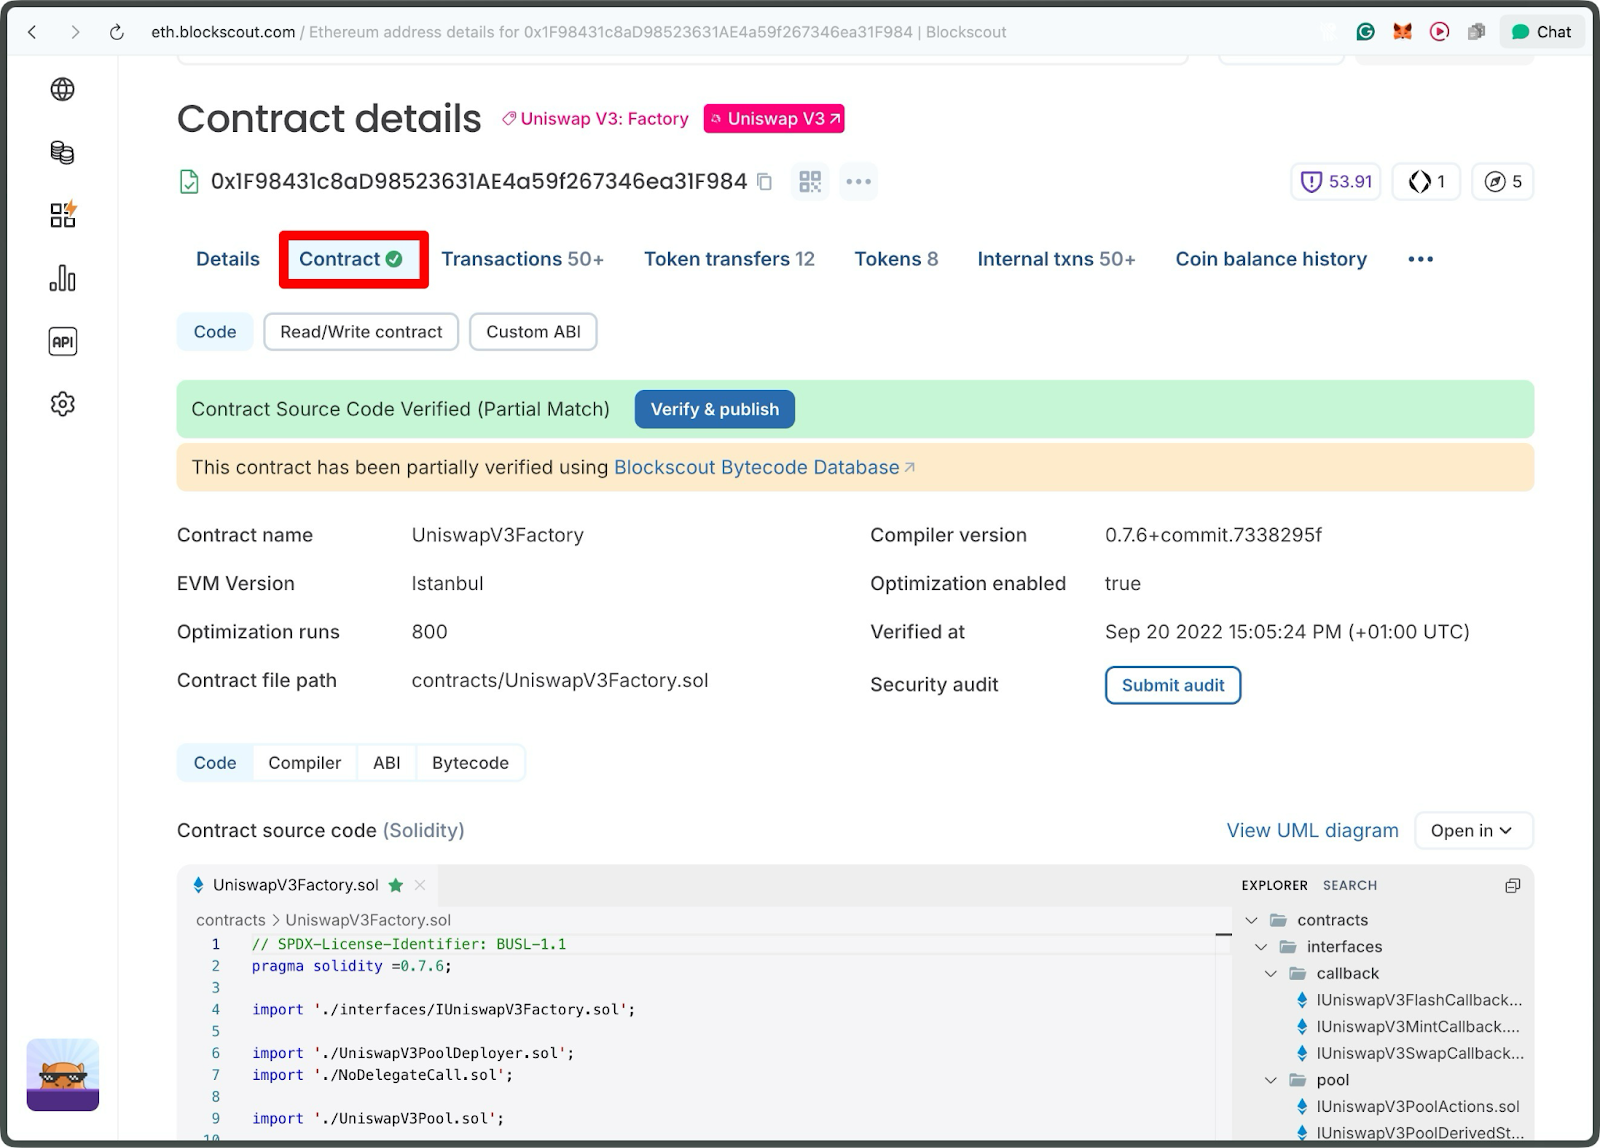
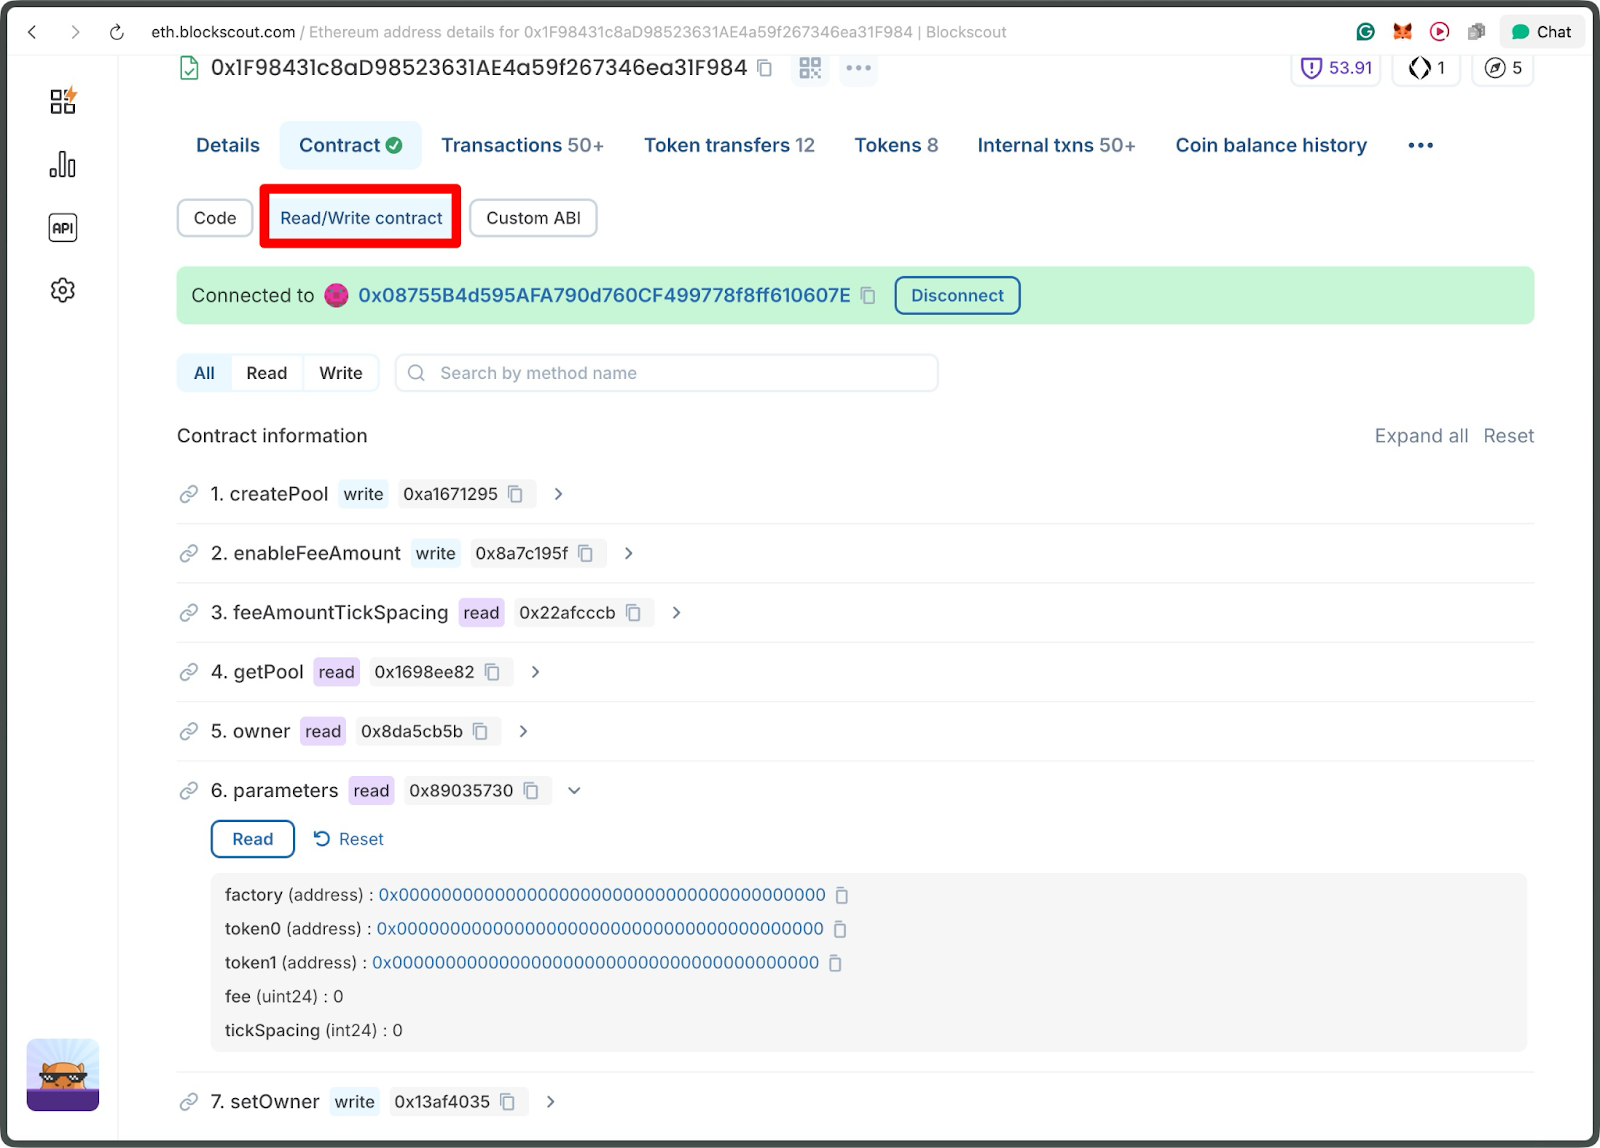
From the contract page, you can interact with the contract live in the Read/Write Contract Tab.
From the Code tab, you can view and read the source code

Conclusion
Smart contract behavior can only be understood by looking beyond surface-level details, and Blockscout makes that depth both accessible and intuitive. By revealing deployment origins, contract relationships, implementation logic, and real onchain activity, it equips researchers, developers, and analysts with the clarity needed to evaluate any contract’s integrity and purpose.
As blockchain ecosystems continue to expand, mastering these investigative techniques becomes essential, and Blockscout remains one of the most effective tools for navigating the full lifecycle of smart contracts with confidence.